Date
Mar. 22, 2018


Mar. 22, 2018
Gravity Forms has tons of add-ons to help extend the functionality of their forms. One add-on that we’ve come to love is the Gravity Forms Dropbox Add-on. We use this add-on as part of our on-boarding process to help organize our client uploads. I’ll explain the process in detail below.
At nvision, we have a content-first approach that we apply to each of our projects. We believe that the content serves as the foundation for the project and is essential to have while coming up with a successful design. We call this stage of the project the content acquisition phase.
One step in our content acquisition phase is to collect any assets from the client that would be relevant to display on the website. These assets could be anything from logos, to product shots, to team member photos, etc. One problem that we started to experience during this step was that clients would email us a handful of assets in one email, a few days would go by, some more assets would be sent in another email, a few more days would go by, and this would continue on. There isn’t anything wrong with collecting your content in separate chunks, the problem lies within trying to organize all of these files while keeping everyone aware of the new uploads as they come in these bursts.
What we decided to do to address this problem was to allow our clients to self-manage their uploads (to a certain degree). We figured since we’re already organizing our content by client-specific directories, why not allow the client to continually add their assets to their specific directory.
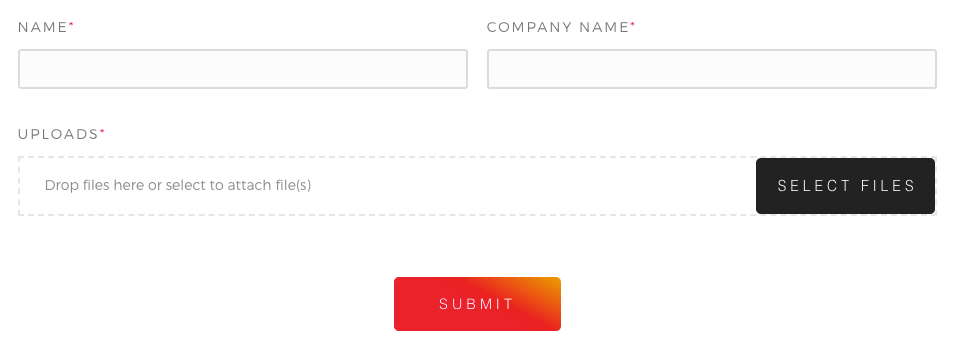
The logic behind this method is to guide the client to a page on our website that houses a Client Uploads form. This form is super-simple; only containing a field for the client’s name, company name, and uploads.
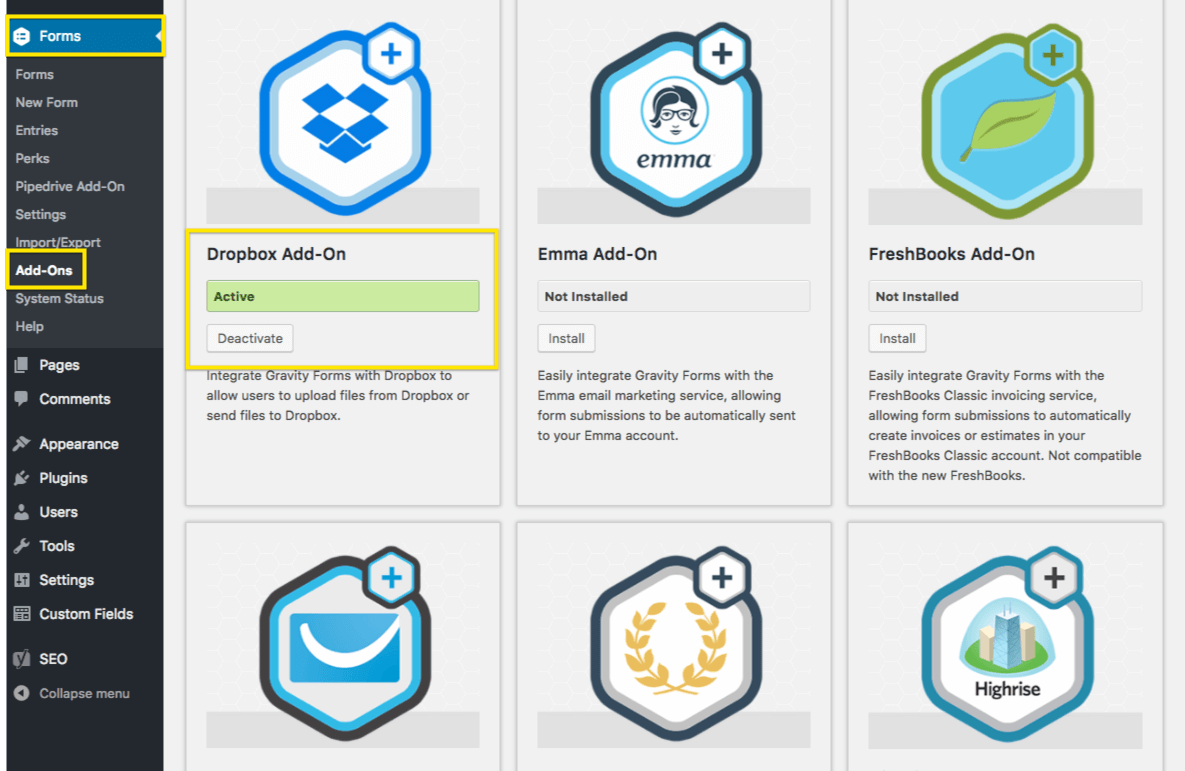
To Install the Dropbox add-on, simply navigate to the Forms > Add-Ons submenu item and scroll down until you hit the Dropbox Add-On. Click Install. When prompted, click the Activate Plugin button.
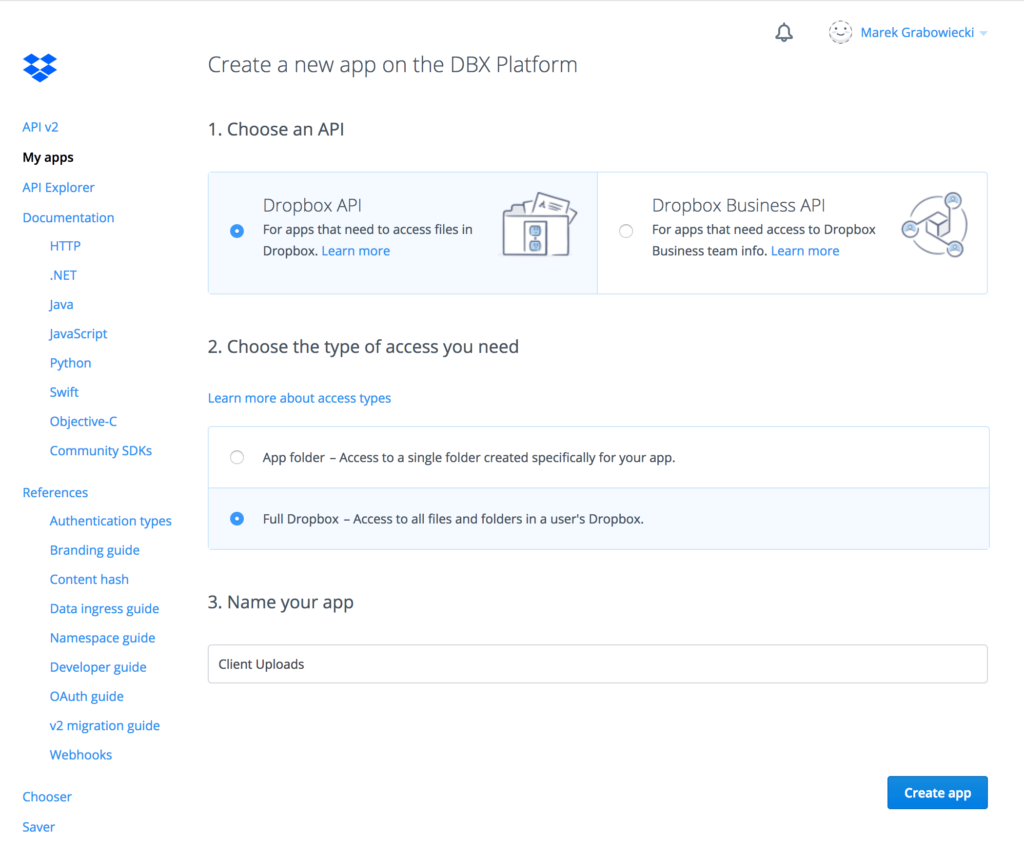
Gravity Forms has an instructional guide on how to create a custom Dropbox app, found here: Creating a Custom Dropbox App. The instructions from the guide are shown below:
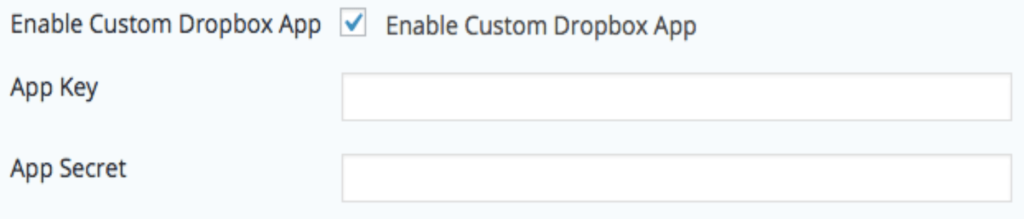
Gravity Forms has an instructional guide on what to do for this step, found here: Configuring the Dropbox Add-On. The instructions from the guide are shown below:
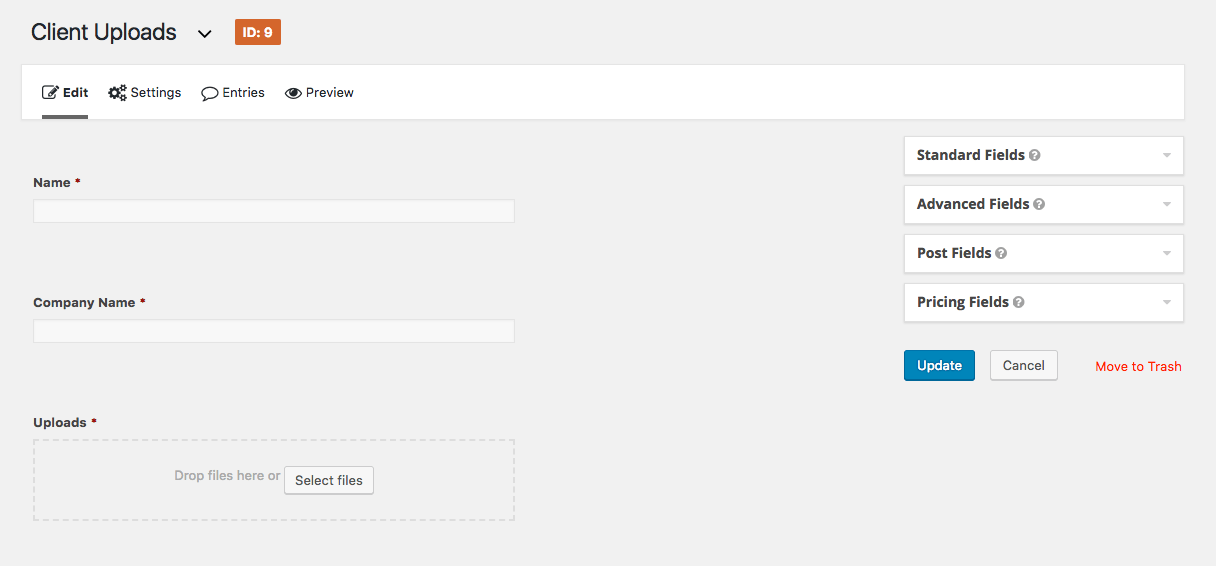
When you create your form, give it a relevant name so that it’s easy to manage. I suggest naming the form Client Uploads.
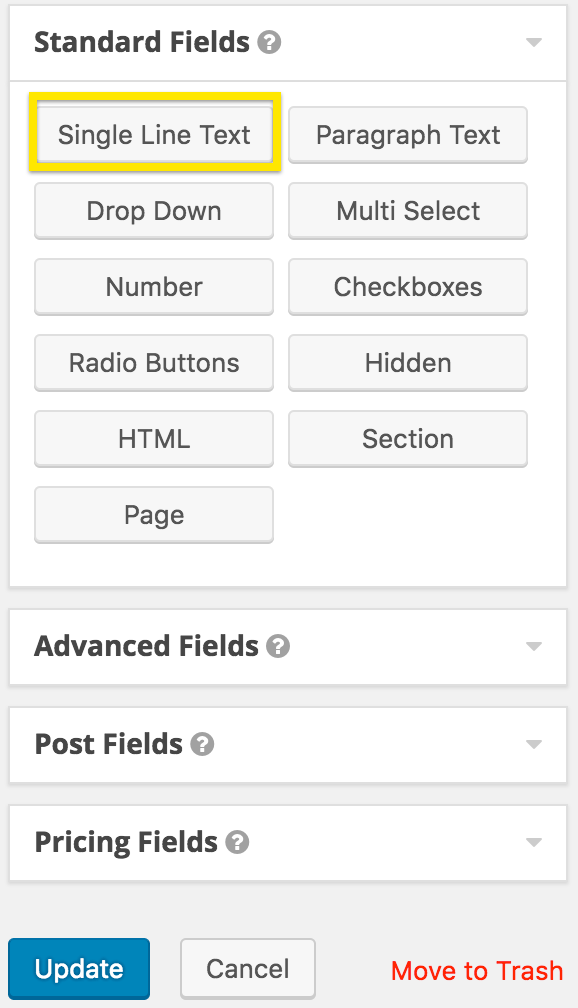
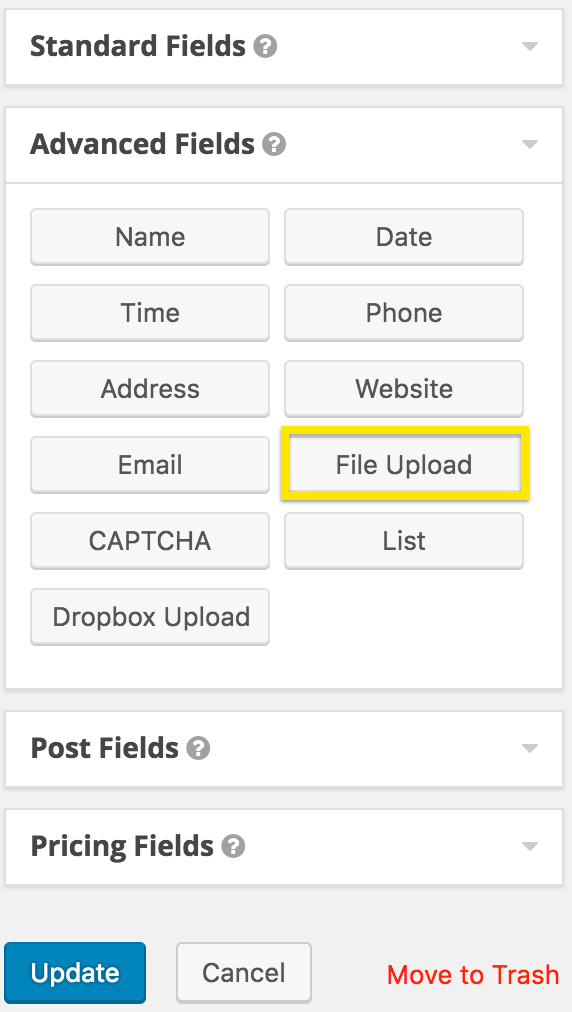
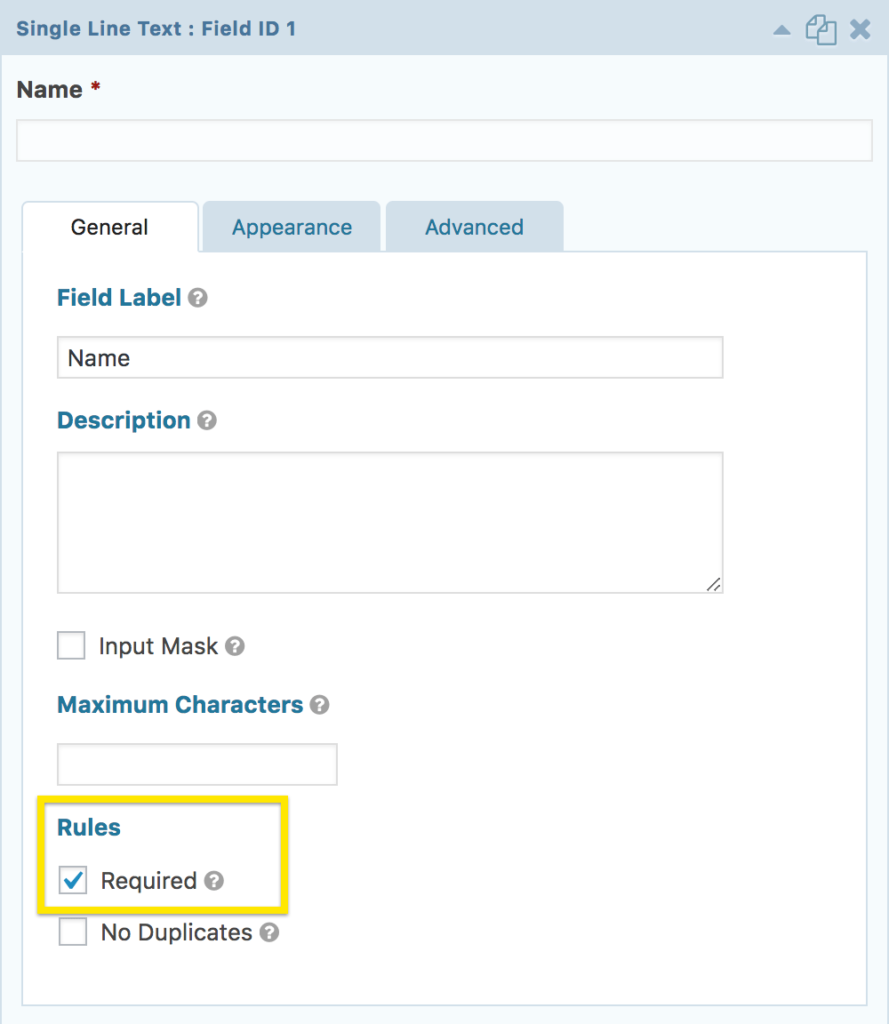
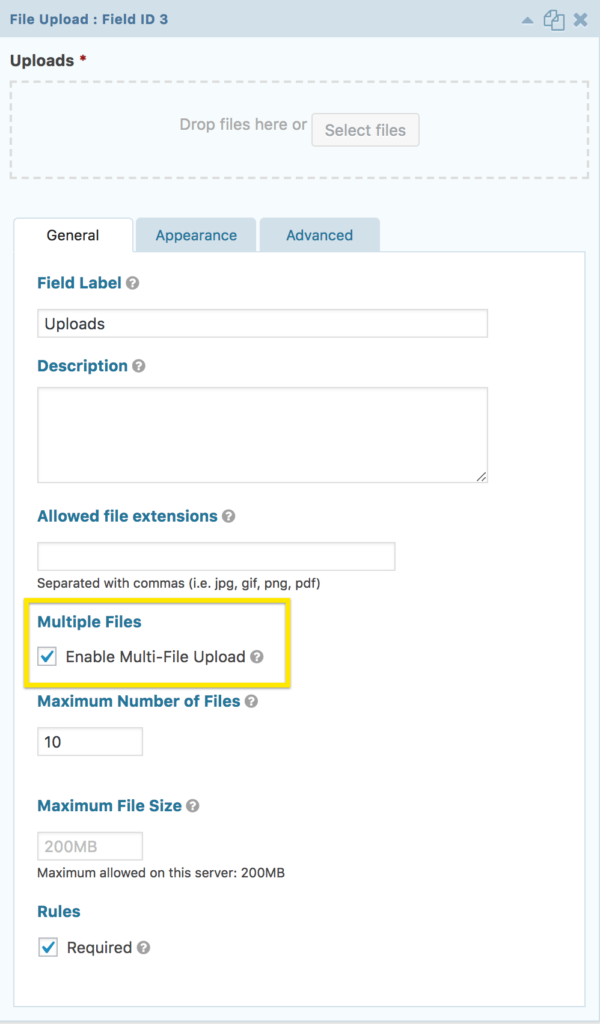
Next, you’ll need to add a field for the name, company name, and uploads.
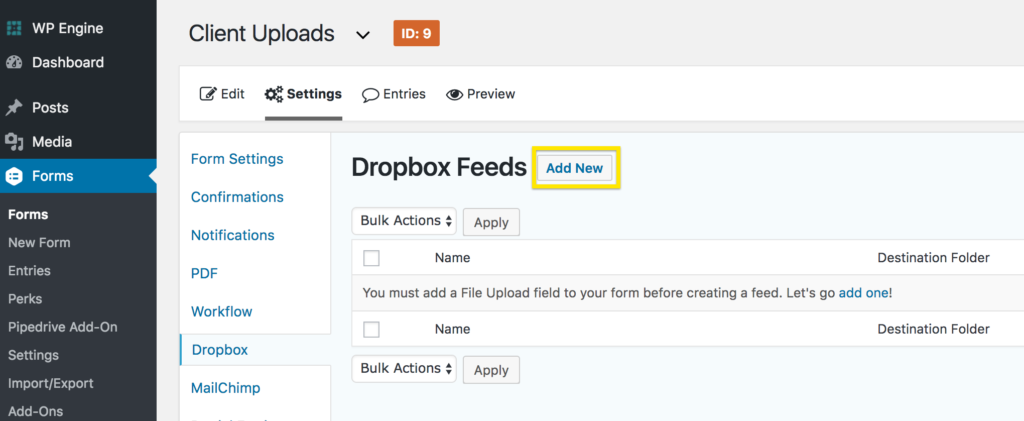
First, we’ll want to add a Dropbox feed to the form. To do this simply navigate to the form’s settings, click the Dropbox link, and press the Add New button.
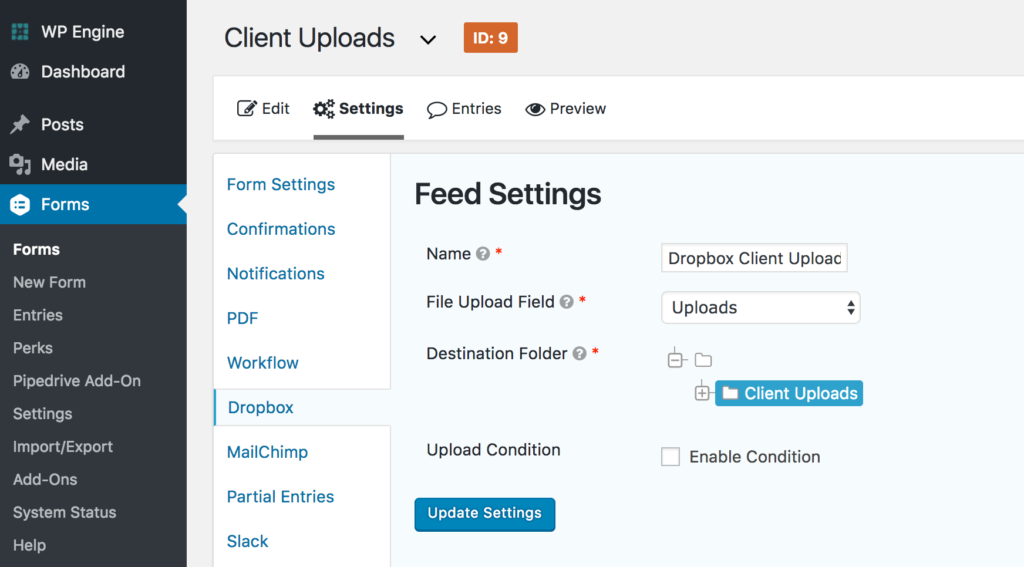
Now that the feed has been created, you’ll need to configure it. Start by naming the feed something relevant (I chose Dropbox Client Uploads). Then choose the correct File Upload Field (I gave my field an Admin Field Label of Uploads). Finally, choose a Destination Folder. This is the folder that will contain all of the separate client directories. The next step handles the actual organization of the uploads to the appropriate client directory.
Insert the following snippet into your functions.php file. Note that the only variables that might require modification are the $uploads_field_id and $uploads_form_id variables.
// Organize the uploads in our uploads directory by client_name
function upload_to_client_dir( $folder_path, $form, $field_id, $entry, $feed ) {

    // ID of the field used to collect the client name
    $uploads_field_id = '2';

    // Replace spaces with a hyphen and remove all non-alphanumerics
    $client_dir = str_replace( ' ', '-', rgar( $entry, $uploads_field_id ) );
    $client_dir = preg_replace( '/[^A-Za-z0-9-]/', '', $client_dir );

    // Create a folder for the client to add their uploads to
    return $folder_path . '/' . $client_dir;

}

// Update the dropbox upload path on a specific form (uploads form)
$uploads_form_id = '9';
add_filter( 'gform_dropbox_folder_path_' . $uploads_form_id, 'upload_to_client_dir', 10, 5 );
A quick summary of what is happening in the snippet:

If you’re having issues getting this to work on your site or were able to get it to work and are excited about the amount of time you’re now saving, please leave a comment below!
Read More About

Book with us
Warning: Working with our team may result in excessive creativity, uncontrollable 'aha' moments, and an addiction to perfect pixels. Please proceed with caution.