Skip To Content

2023 Step-by-Step Guide: How to Create a Google Maps API Key

Development

Marek Grabowiecki Client Success Manager

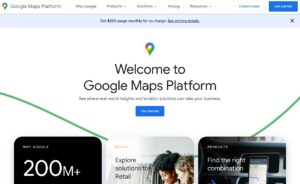
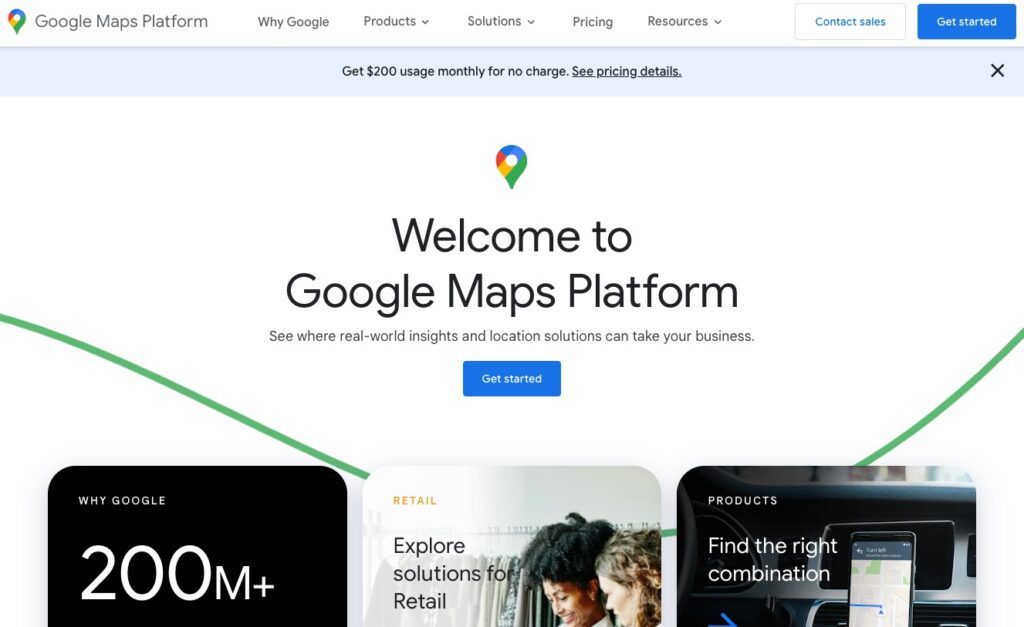
If you’re looking to integrate your website with Google Maps you’ll likely need to create a Google Maps API key to leverage their Places and Location look-up technology. Over the last few years, Google has changed how their Maps technology works so I’ve created a step-by-step guide that explains how you can create a new Google Maps API key.

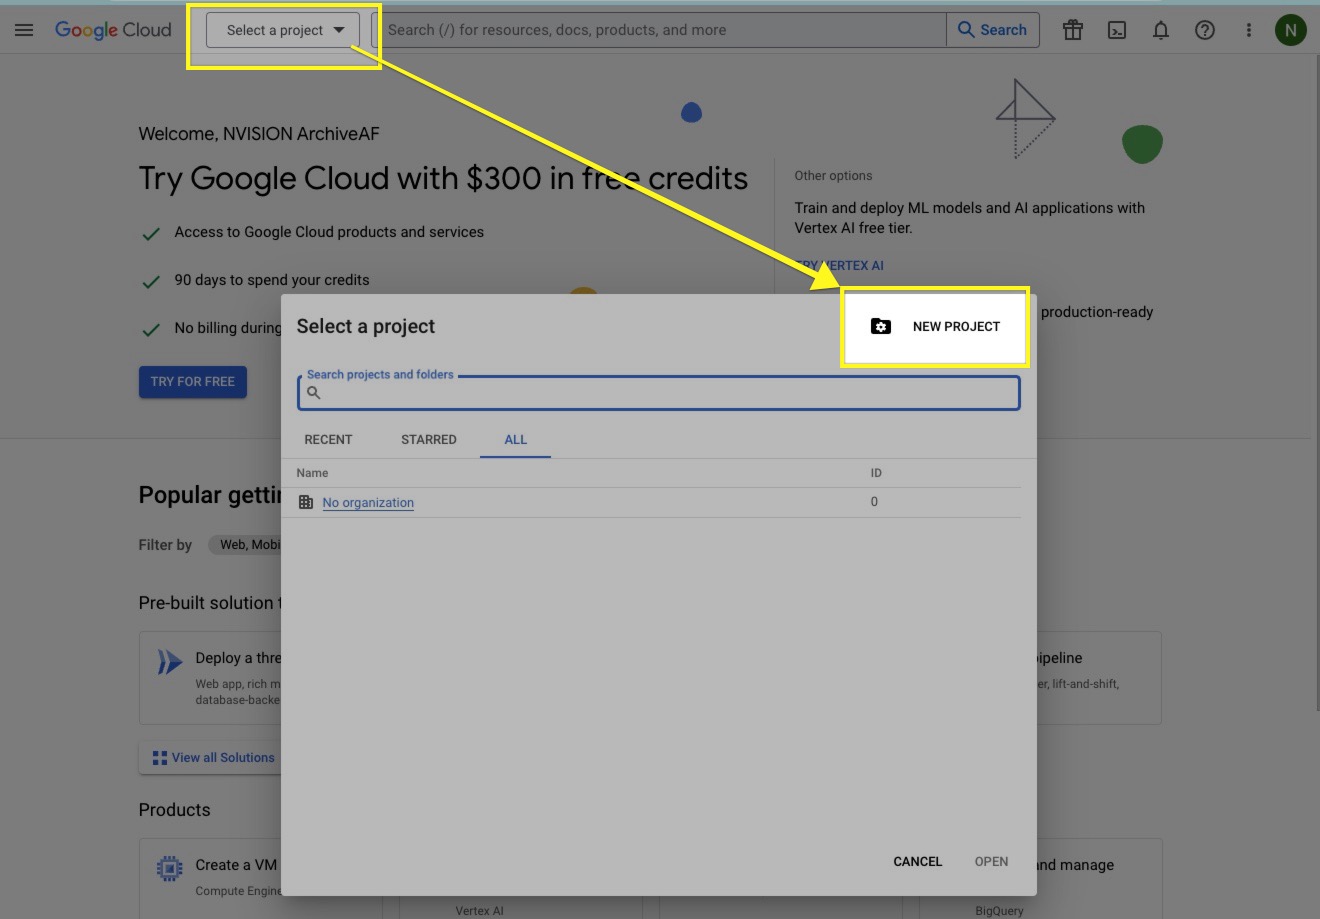
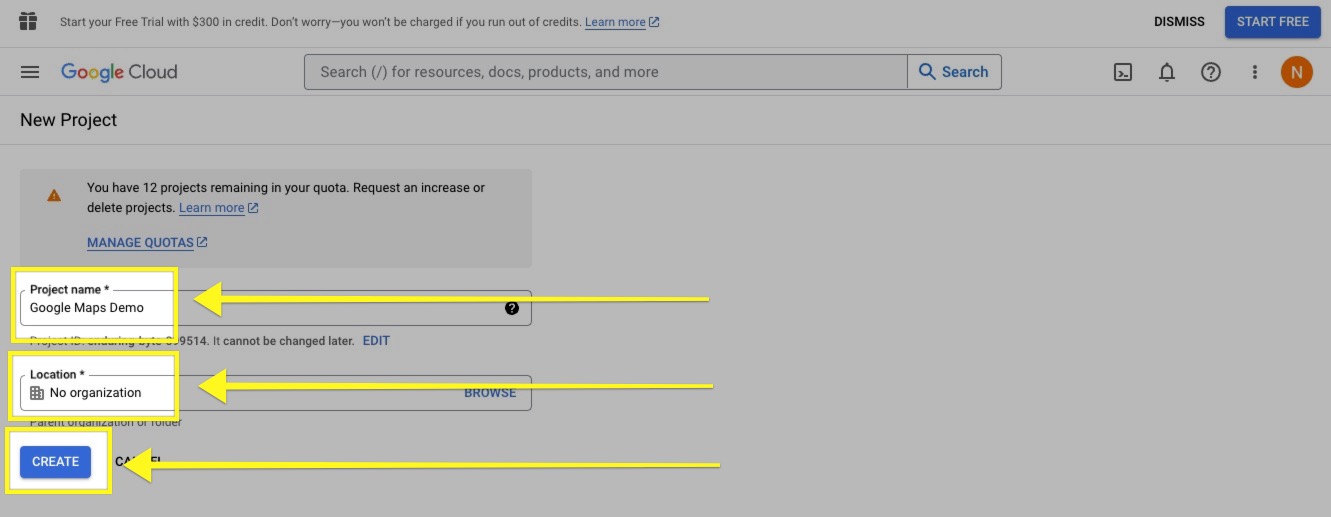
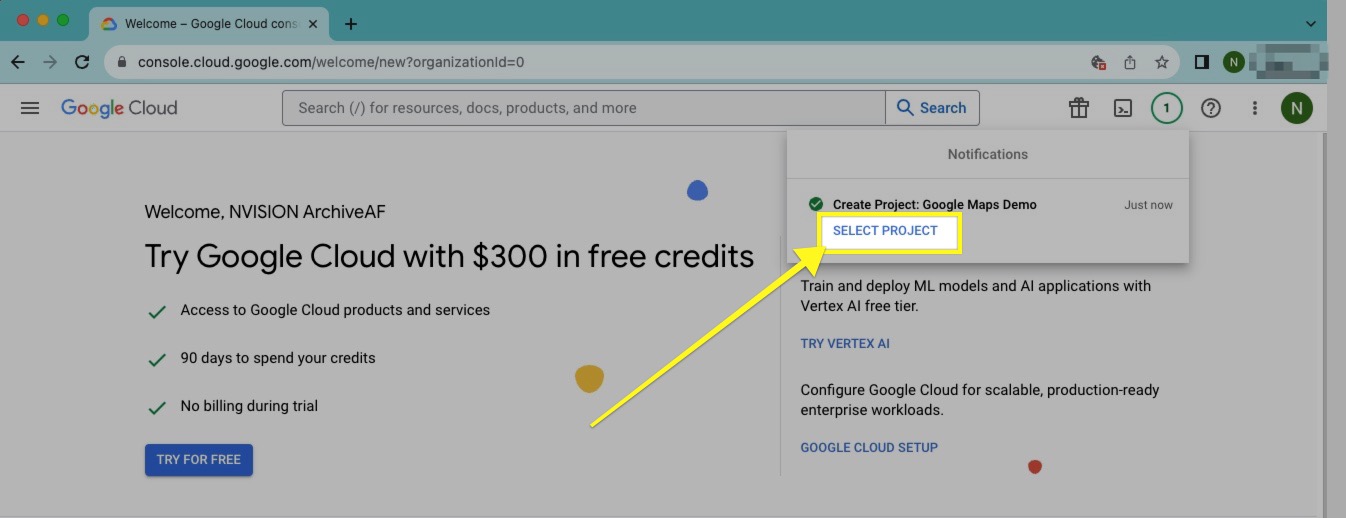
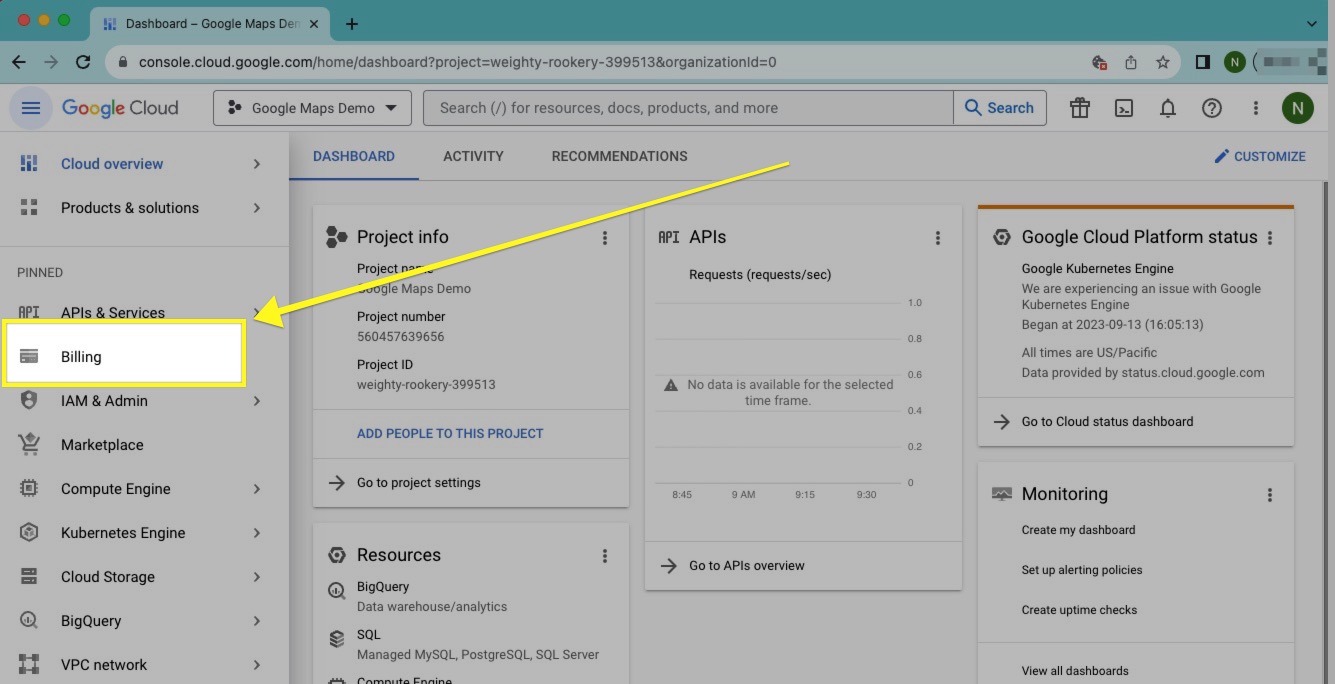
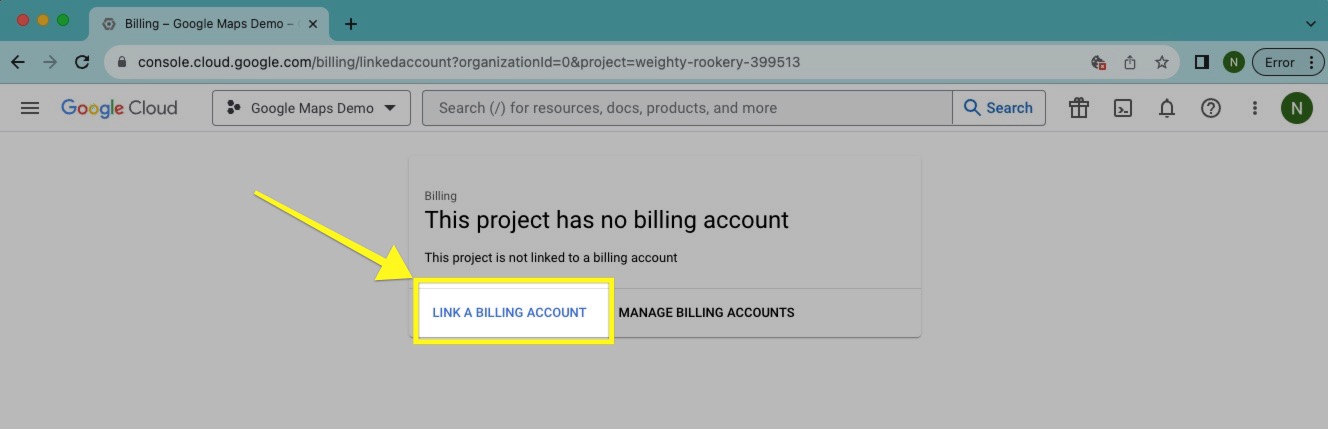
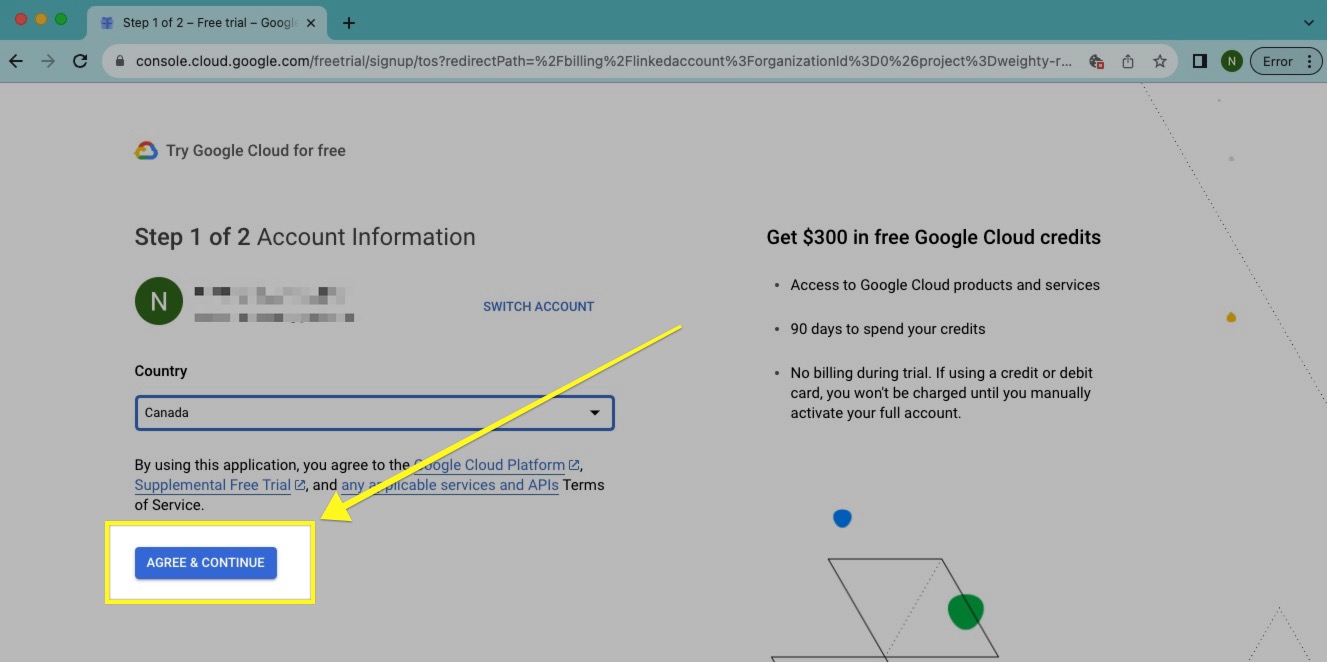
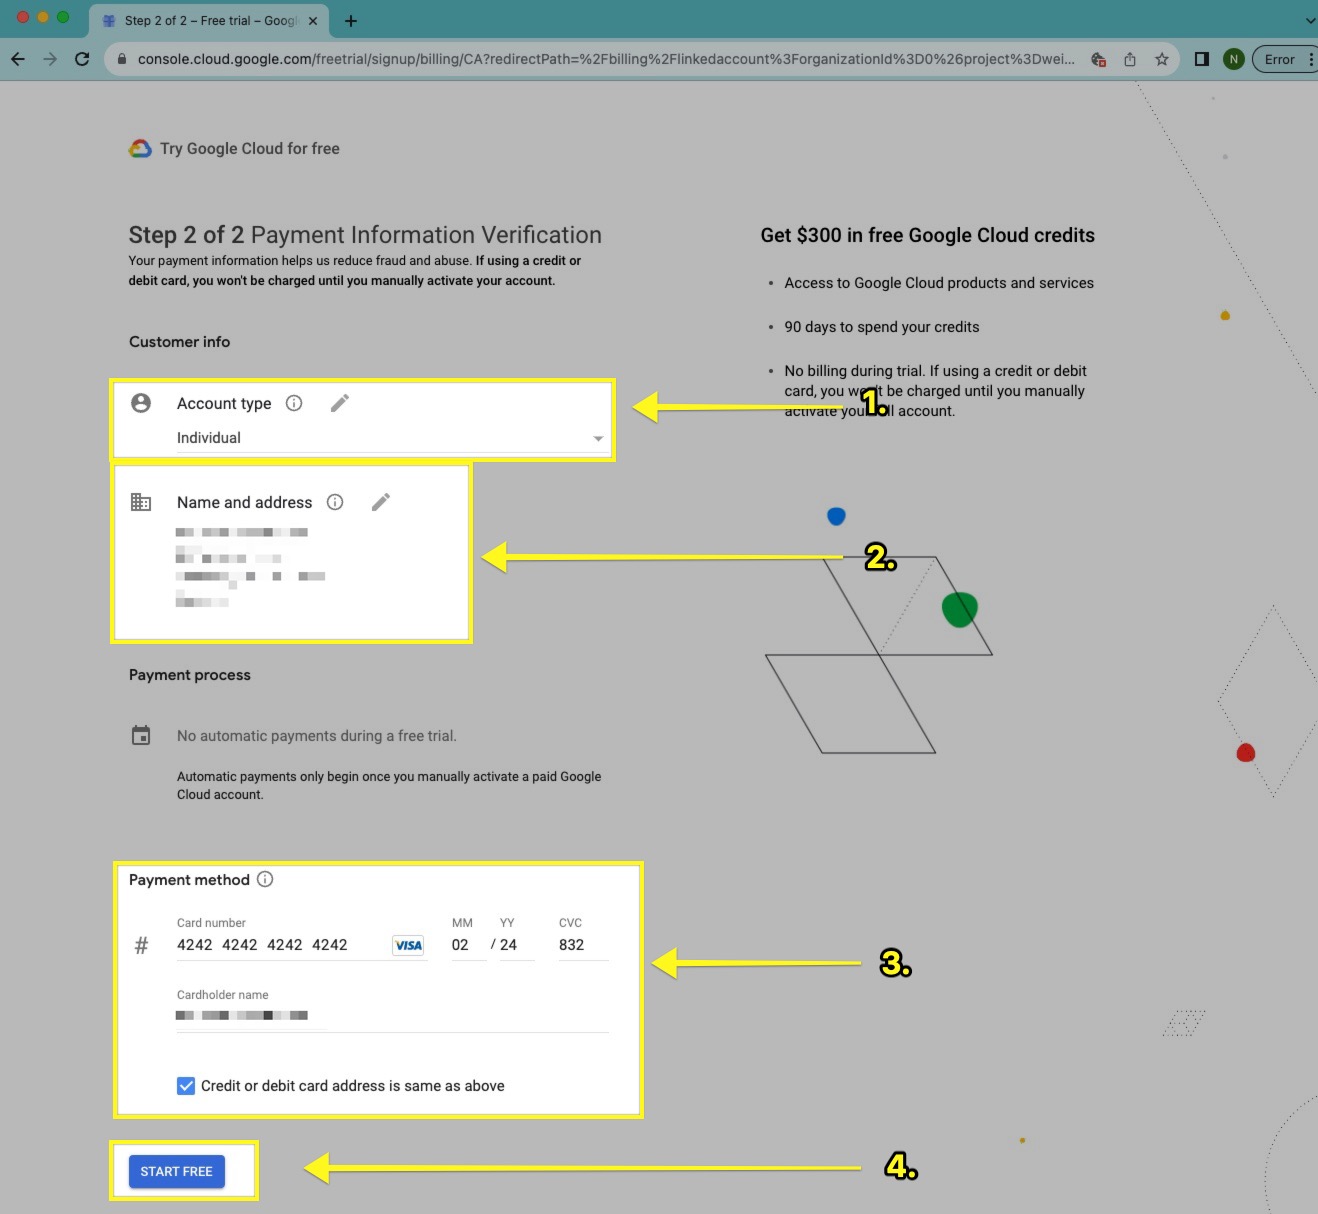
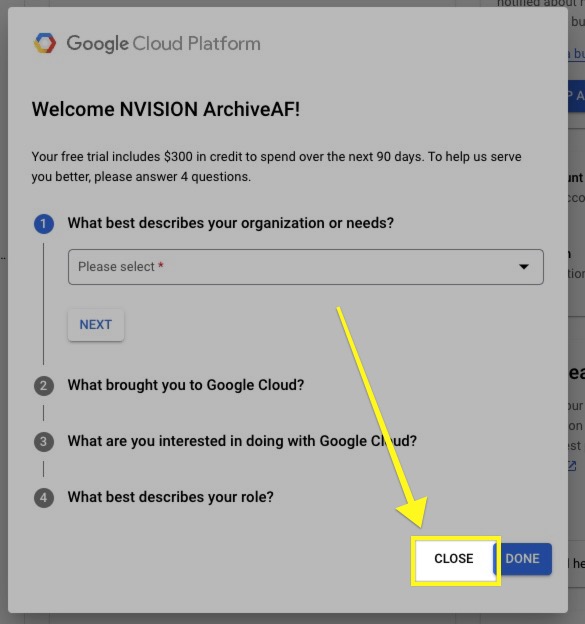
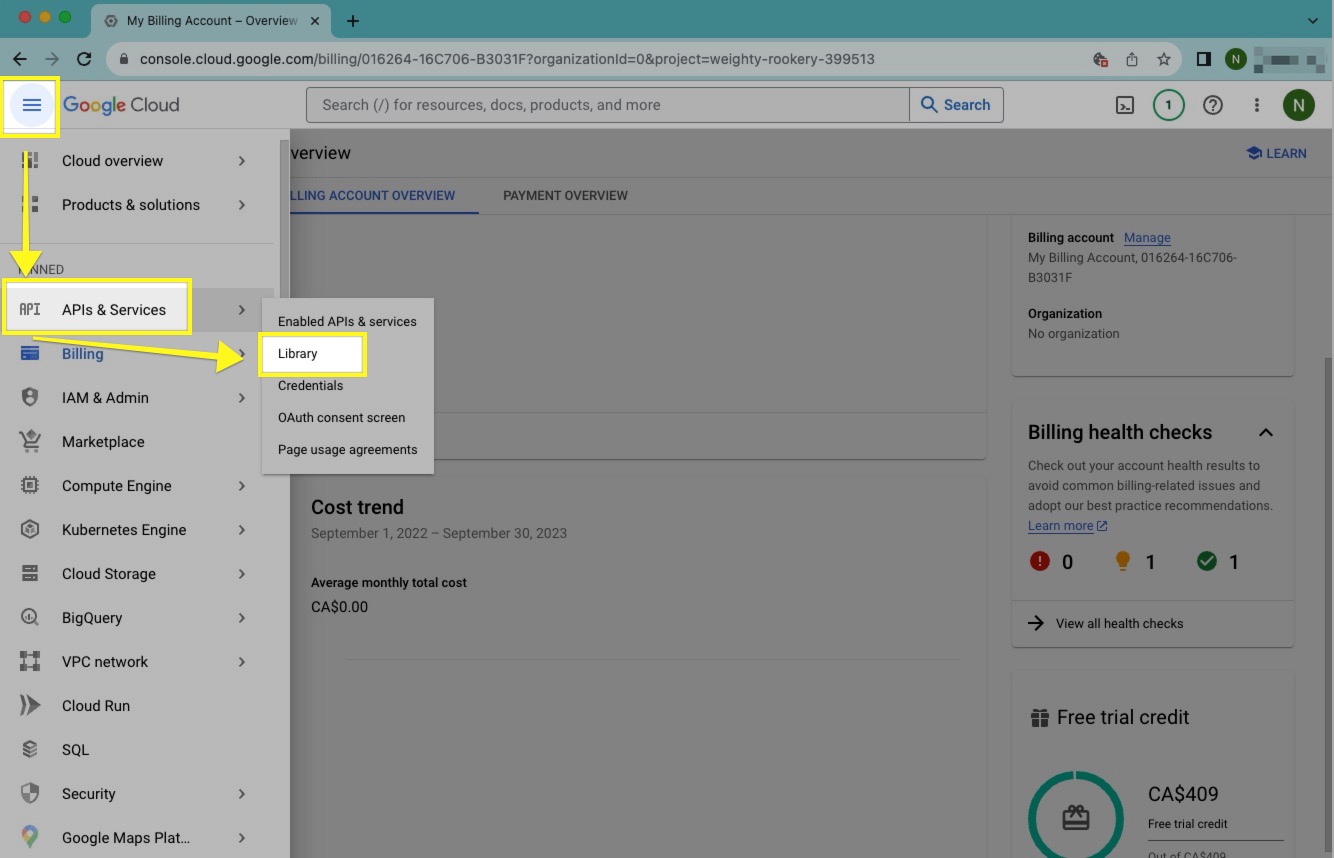
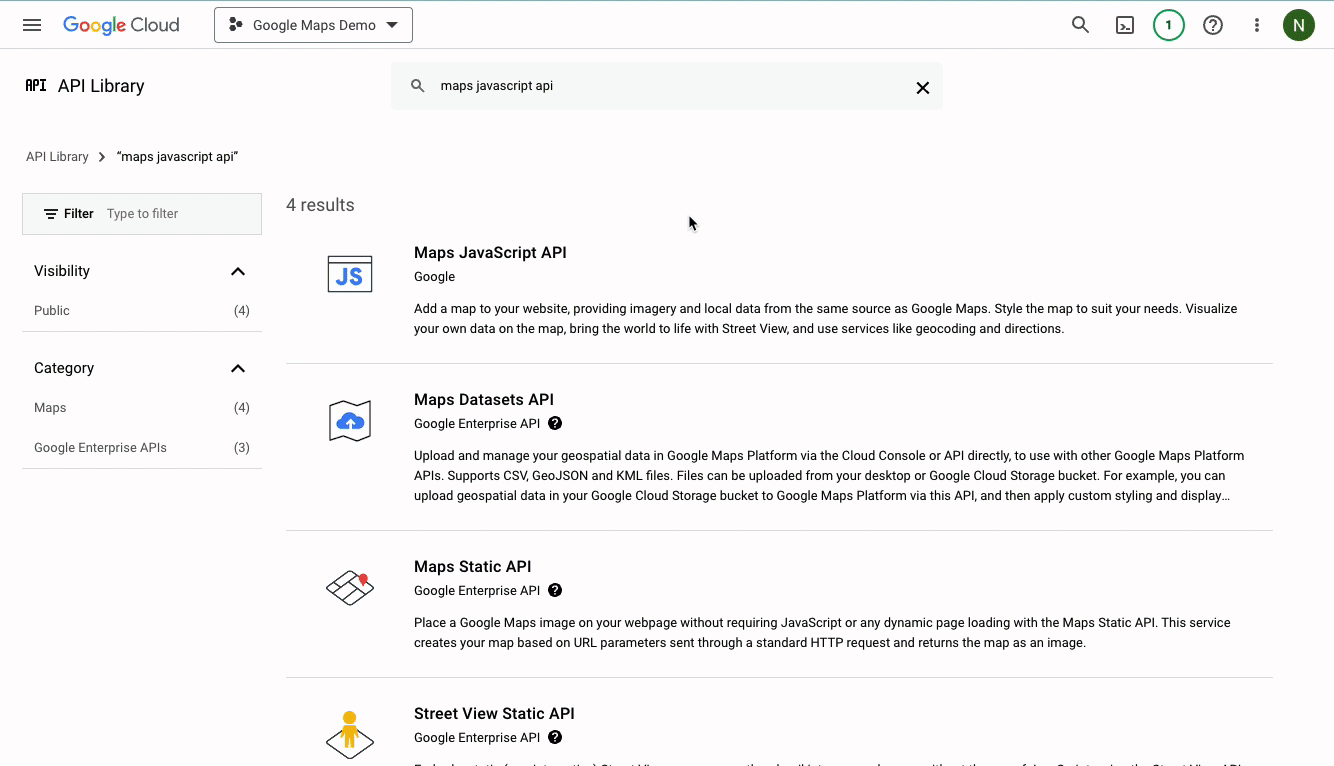
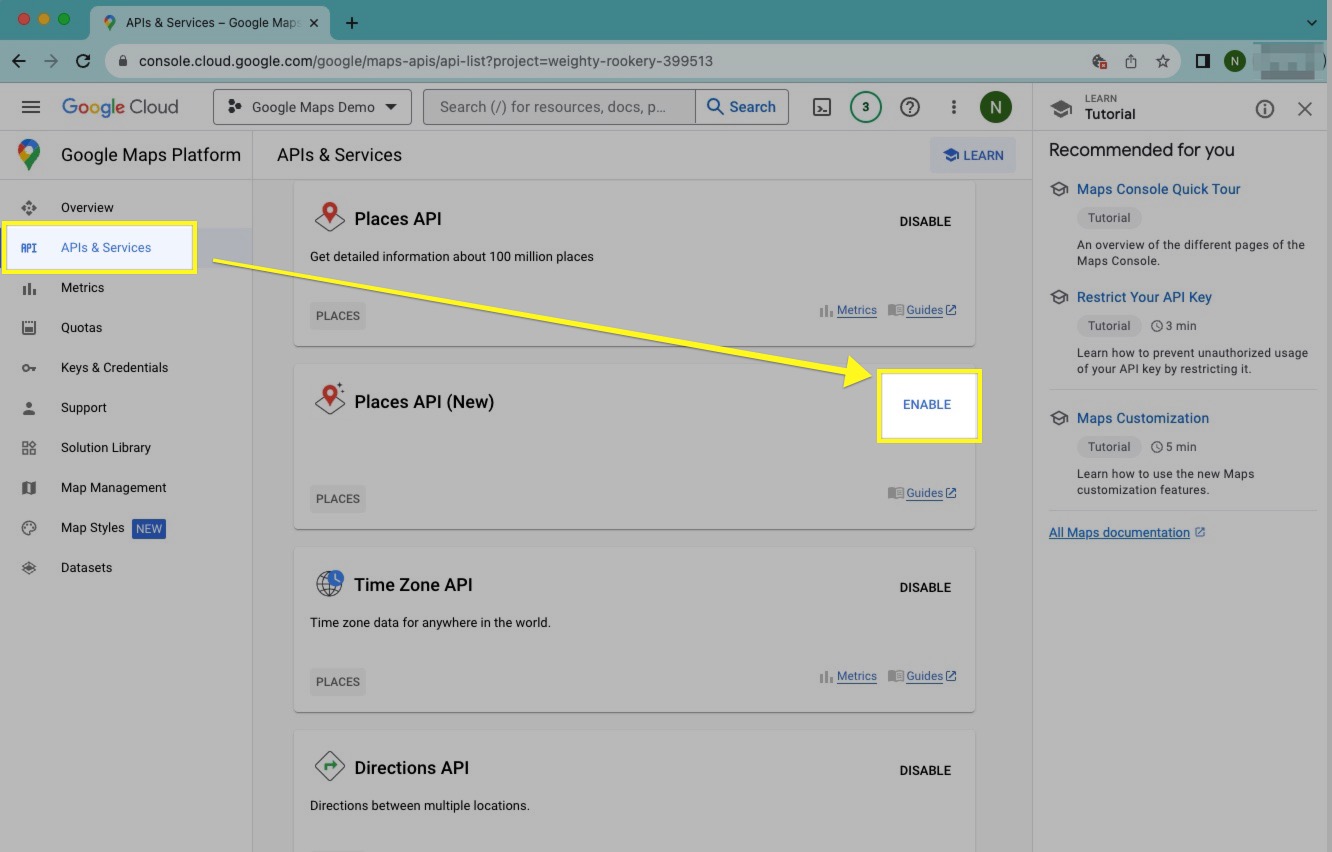
Creating a new Google Maps API key involves several steps, including setting up a Google Cloud project, enabling the Maps JavaScript API, and generating the API key.

Follow these step-by-step instructions that explain How to Create a Google Maps API Key

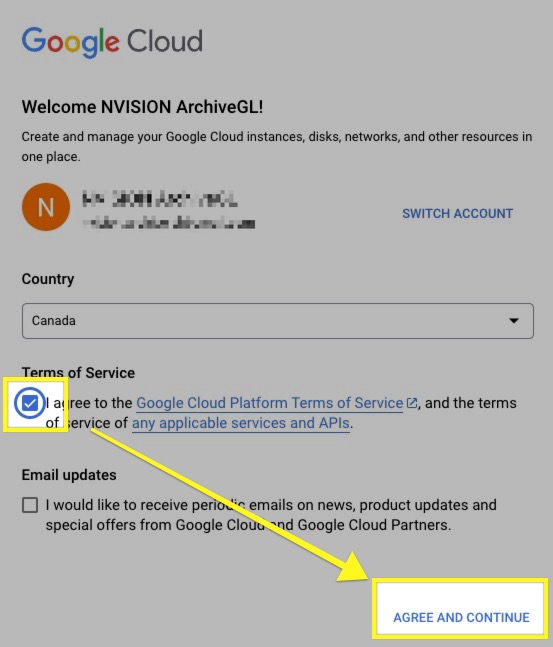
Note: You’ll need a Google account to complete these steps.

1. Log In to Google Cloud Console:

  • Go to Google Cloud Console.
  • Sign in with your Google account if you’re not already logged in.
  • Review and agree to the Terms of Service and continue.

2. Create a New Project:

  • If you don’t already have a project created, click on the project name at the top of the page and then click on New Project.
  • Give your project a name, and choose an organization if applicable. Click Create.
  • You’ll likely be redirected to the Dashboard after creating your project. Click the Select Project button that appears in the notification popup.

3. Enable Billing:

  • To use the Maps APIs, you must enable billing for your project. Ensure that your project is selected and select Billing from the navigation menu (☰).
  • Click the Link a Billing Account option.
  • Click the Create Billing Account option. This prompt will appear if you have not previously created a Billing account.
  • Choose your Country and click the Agree & Continue button.
  • Provide your information including the Account Type (Individual or Business), Name and Address, and Payment Method details. Press the Start Free button once you’ve provided all of your information.
  • You will see a notification message stating that your account is being set up. Wait a few moments and if you are not redirected, click the X to close the notification and press the Start Free button again. You will be redirected to the Dashboard after the account setup has finished.

4. Feedback and Platform Tour

  • Google Maps may try to ask for your feedback. Feel free to provide your feedback or close the prompt.
  • Google Maps may also attempt to give you a virtual tour of the platform. Either follow the steps to complete the tour or press the X to dismiss the tour.

5. Enable APIs and Services:

  • In the Cloud Console, click on the navigation menu () and go to APIs & Services > Library.
  • In the search bar, type “Maps JavaScript API” and select it from the list of results.
  • Click into the Maps Javascript API item and press the Enable button.

6. Create an API Key:

  • After enabling the API, your API Key will be created automatically. You can also find the API Key in the navigation  menu () under APIs & Services > Credentials. Press the Copy icon to copy the API Key to your clipboard.

6a. Restrict the API Key (Optional, but Recommended) from the Prompt:

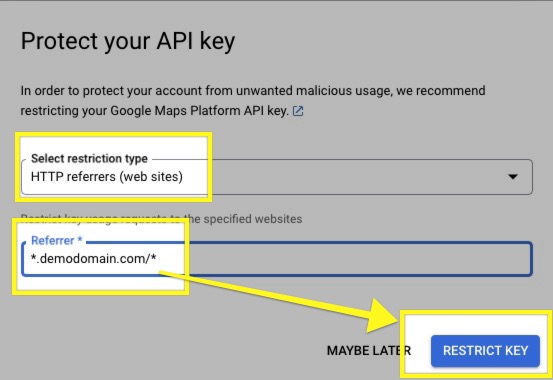
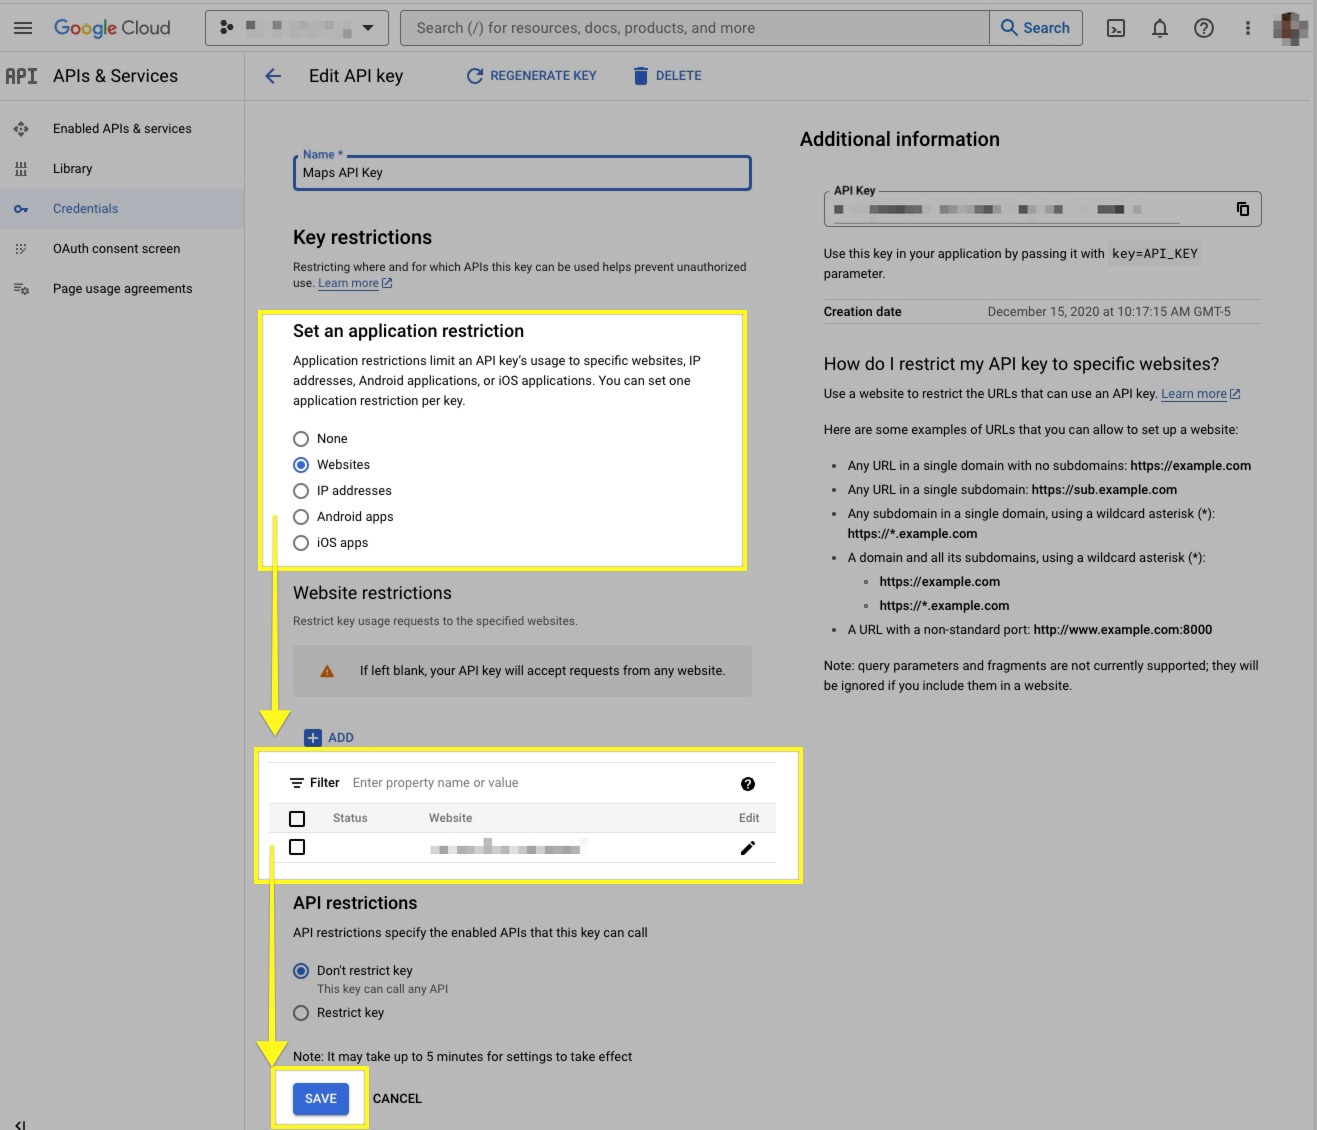
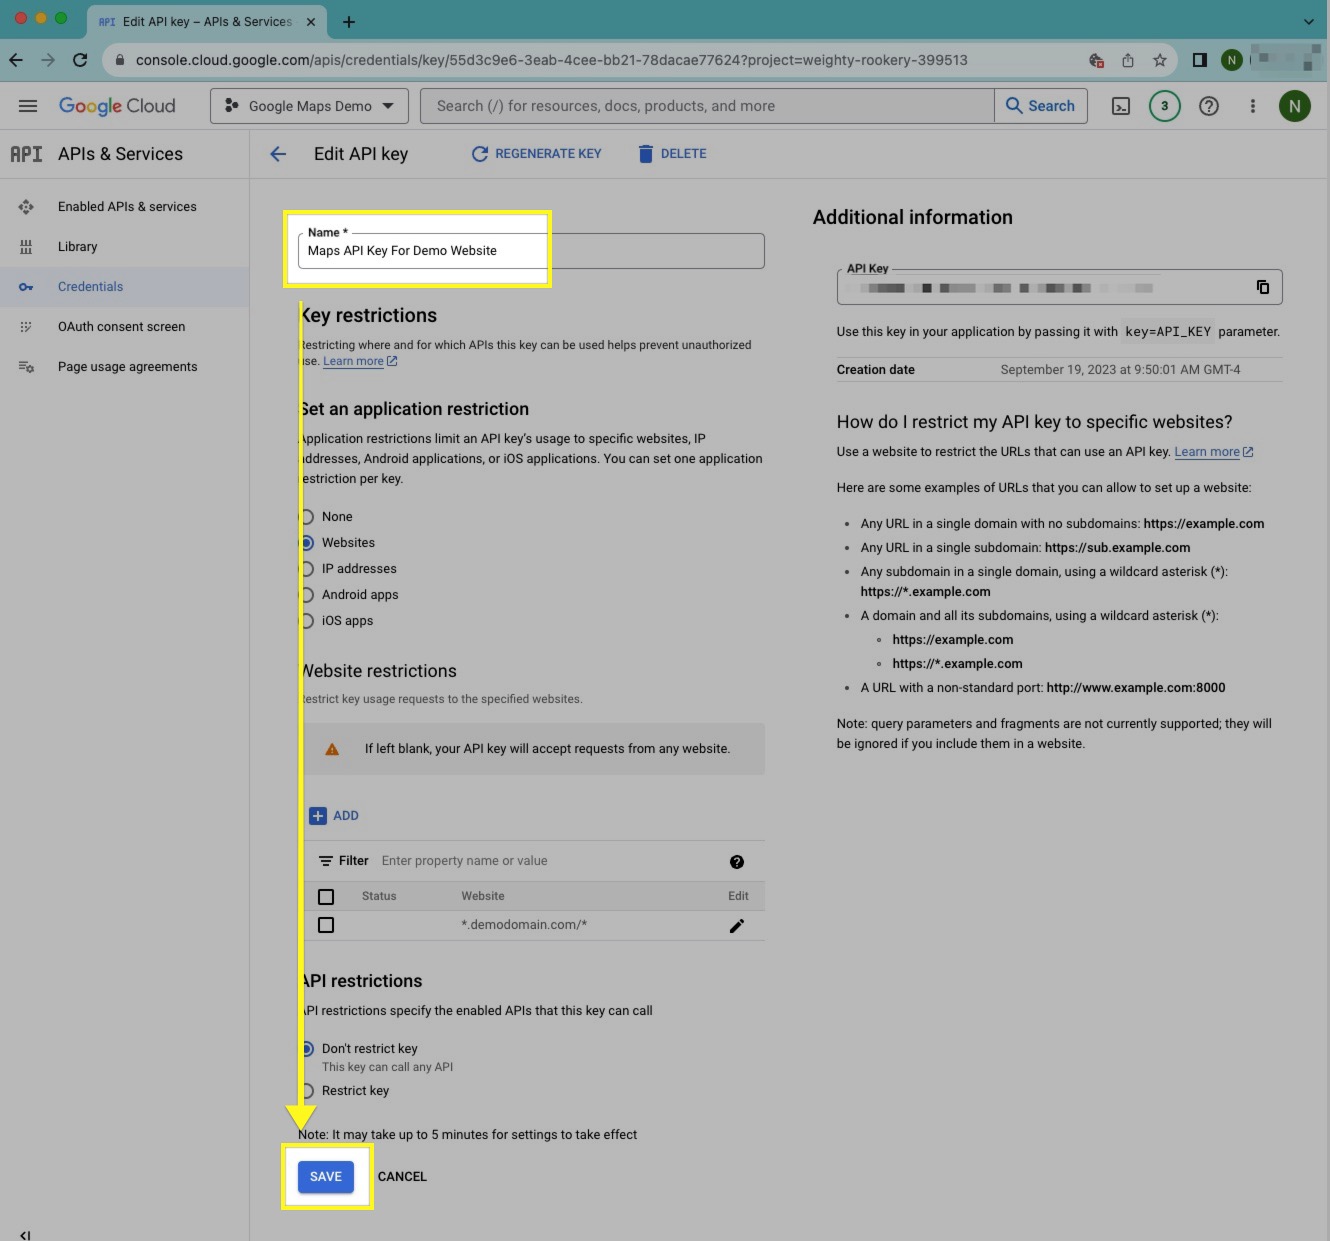
To enhance security and control, it’s a good practice to restrict the usage of your API key to ensure that it’s only being used by the applications and websites that you intend to use the API Key on.

You can restrict your API key by IP addresses, websites, or specific APIs. Configure these settings according to your needs. For our specific needs, we’ll need to restrict the API Key to use the HTTP referrers (web sites) option.

  • After creating the API Key, a pop-up may appear to restrict the API Key. To restrict the API Key to specific website(s), choose the HTTP referrers (web sites) option. Within the Referrer field, provide your website’s domain using the following format: *.yourdomain.com/*
    (the *s are important as they are wildcard identifiers. This ensures that your API Key can be used on any subdomain and subpages associated with your website)

6b. Restrict the API Key from the Dashboard:

  • If you do not receive a prompt to restrict your API Key during your creation process, you can also add the restrictions to your API Key by clicking into the menu () and clicking on APIs & Services > Credentials.
  • Click into your Maps API Key.
  • Use the Website Restrictions settings to implement any of the restrictions that you’d like to assign to your API Key.

7. Enable the remainder of the Google APIs:

  • After restricting your domain, you will be navigated back to the Dashboard. You can enable the remainder of the APIs from the Dashboard using the Enable APIs button.
  • Additionally, you may want to enable the new Places API by clicking into the APIs & Services menu item and clicking the Enable button for the Places API (New) API.

8. Name Your API Key (Optional, but Recommended):

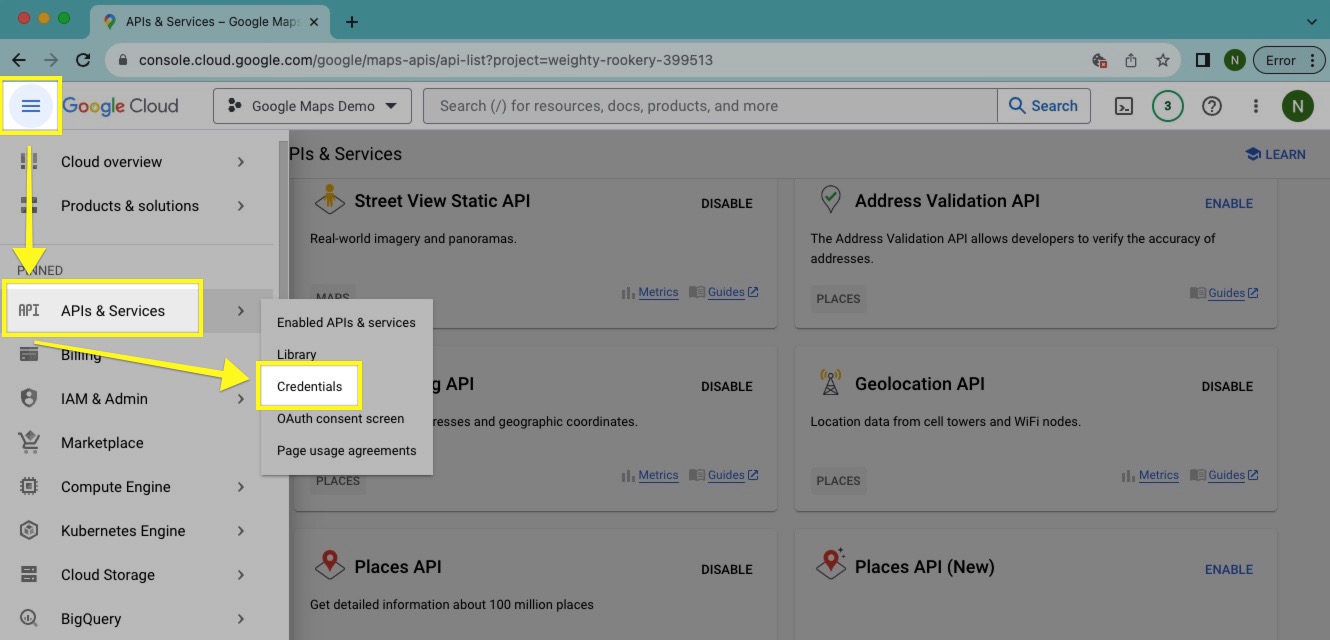
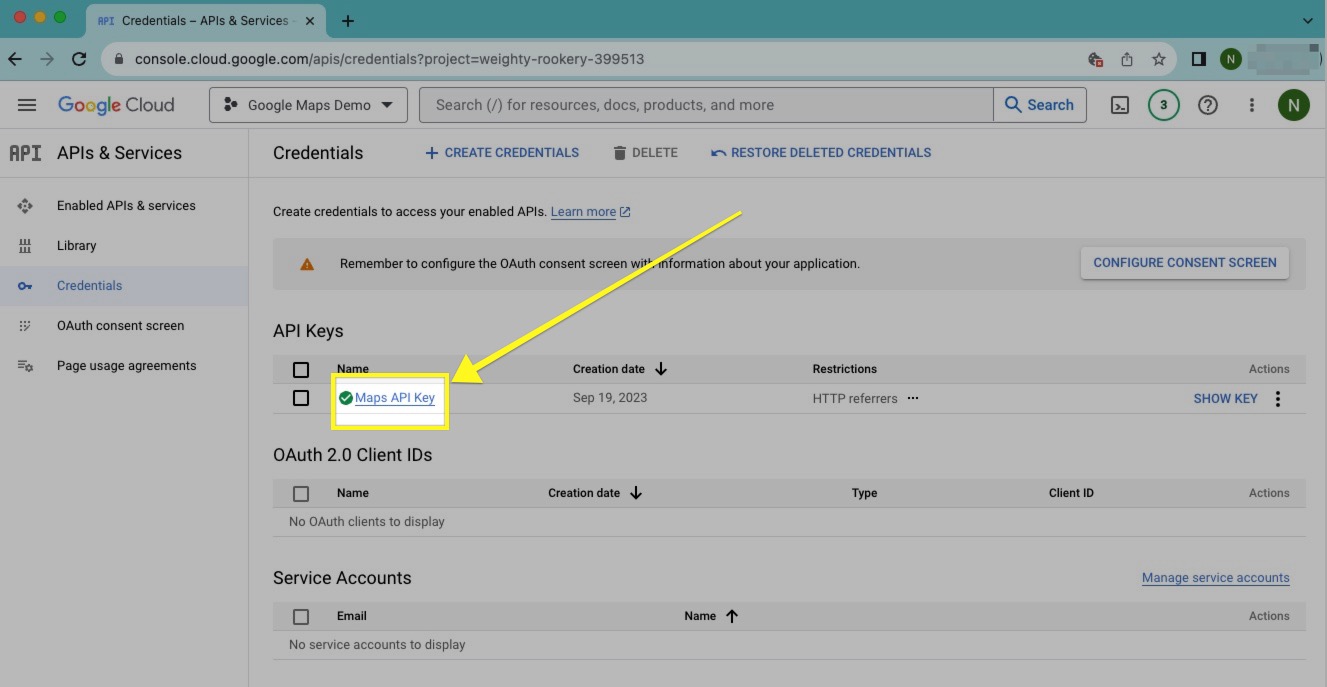
Naming your API Keys accurately is a recommended best practise. This allows you to easily distinguish between the various API Keys that may exist in your project. This is especially helpful if you have multiple team members or external teams accessing your projects.

  • Click into the menu () and click on APIs & Services > Credentials.
  • Click into your Maps API Key that was recently created.
  • Provide a new Name for your API Key. I recommend including the name of the application or website that the API Key will be used by. Press the Save button after you’ve renamed your API Key.
    Example: Maps API Key for Demo Website

9.Where to Find Your API Key:

  • Your Google Maps API Key can always be found within the menu () and APIs & Services > Credentials area.
  • Click on the Show Key link next to your Google Maps API Key.
  • Press the Copy icon to copy the API Key to your clipboard.

10. Congratulations!

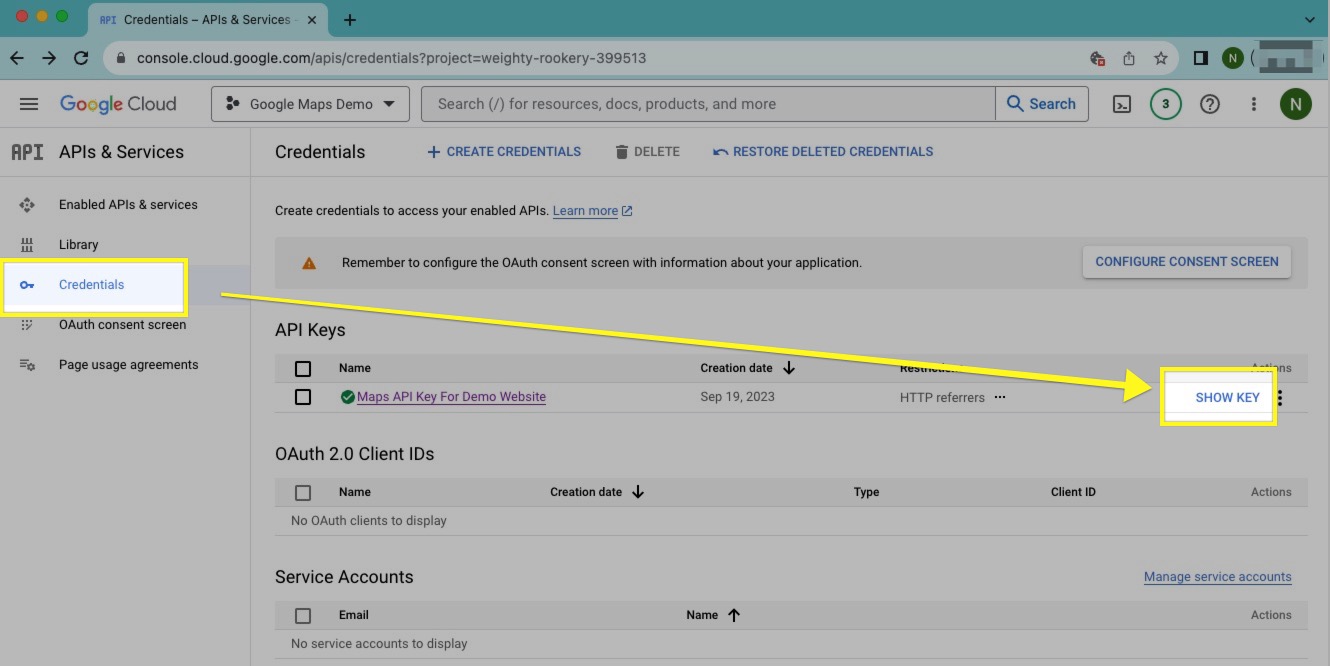
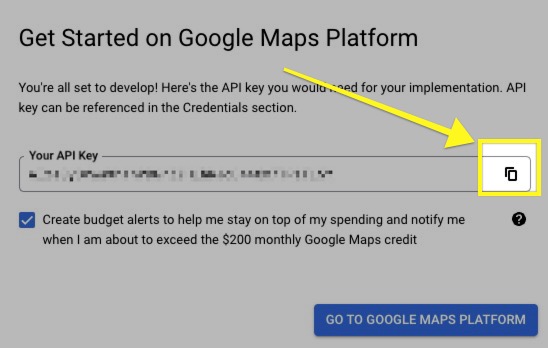
At this point you should have successfully created a Google Maps API key. You can now use this key in your applications and websites to access Google Maps services. Make sure to regularly review and secure your API key to prevent unauthorized usage and potential billing issues.


Comments

Your email address will not be published. Required fields are marked *

Request a Quote

If you’re ready to change the trajectory of your business and
excited to partner with the right team to get the job done.

UP

© 2024 NVISION. All Rights Reserved.