Date
May. 11, 2018


May. 11, 2018
URL shortening is a common technique that is used to turn long URLs into substantially shorter URLs called short links. Short links are used to direct the user to the same page as the long URL but they are much more user-friendly and are easier to share. Branded short links take the technique of URL shortening to the next level by incorporating your brand or company’s name into the shortened URL.
The instructions below explain how to use the services provided by Bitly to add branded short links to your WordPress website.
Before continuing through this set of instructions, please ensure that you have the following items:
Bitly has recently updated the location of their Branded Short Domains settings. To add a Branded Short Domain to your Bitly account simply click on your account name > Manage > Branded Short Domains > Add Branded Short Domain
In Step 2 of the Add Branded Short Domain panel you’ll be provided with two IP addresses. Login to your domain registrar and add these IP addresses as A Records to your Branded Short Domain.
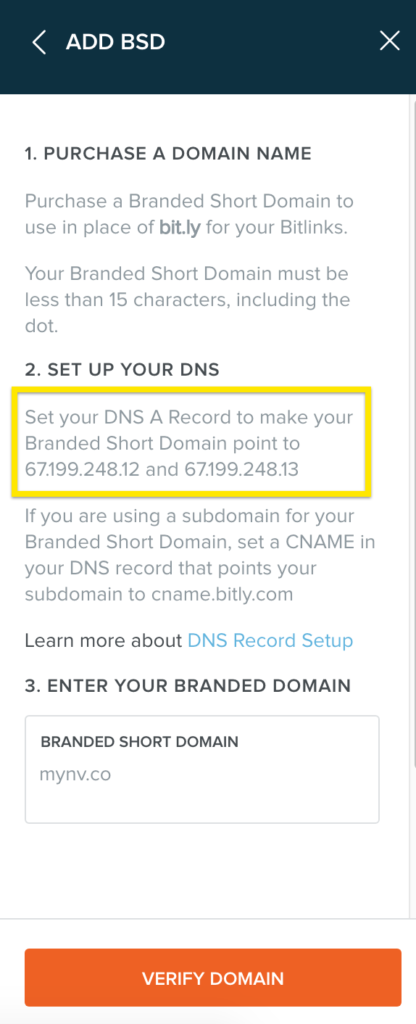
Add your Branded Short Domain to the Branded Short Domain field and click Verify Domain.
Please note that there may be a wait period between updating the DNS on your Branded Short Domain and verifying the domain within Bitly. If the domain verification fails come back at another time and try again. The DNS propagation period could take up to 24 hours to complete.
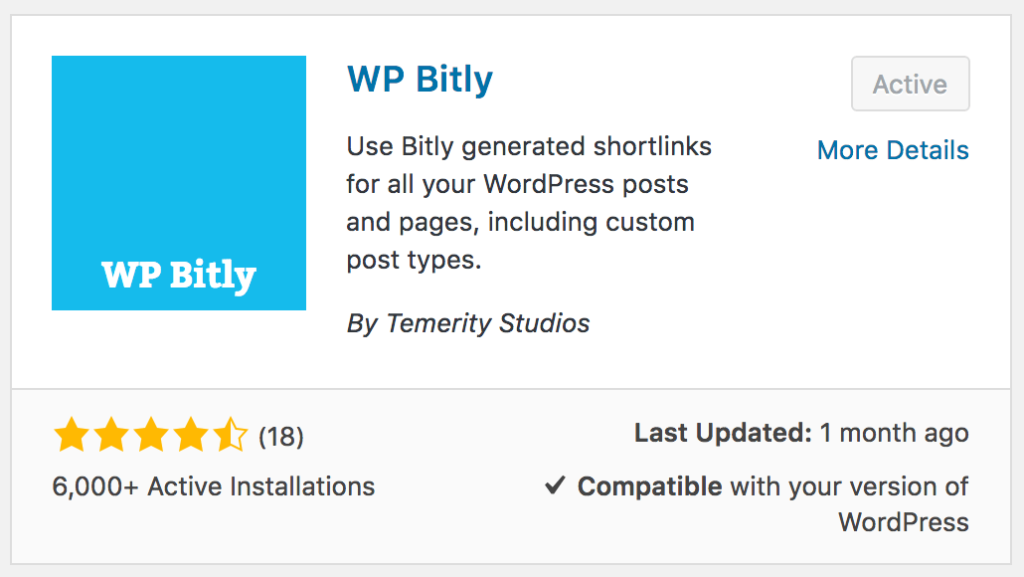
Navigate to the plugin installation area of your site and search for the WP Bitly plugin. Alternatively, you can download the Bitly plugin from the WordPress Plugin Directory.
Navigate to the Bitly website and login to your account.
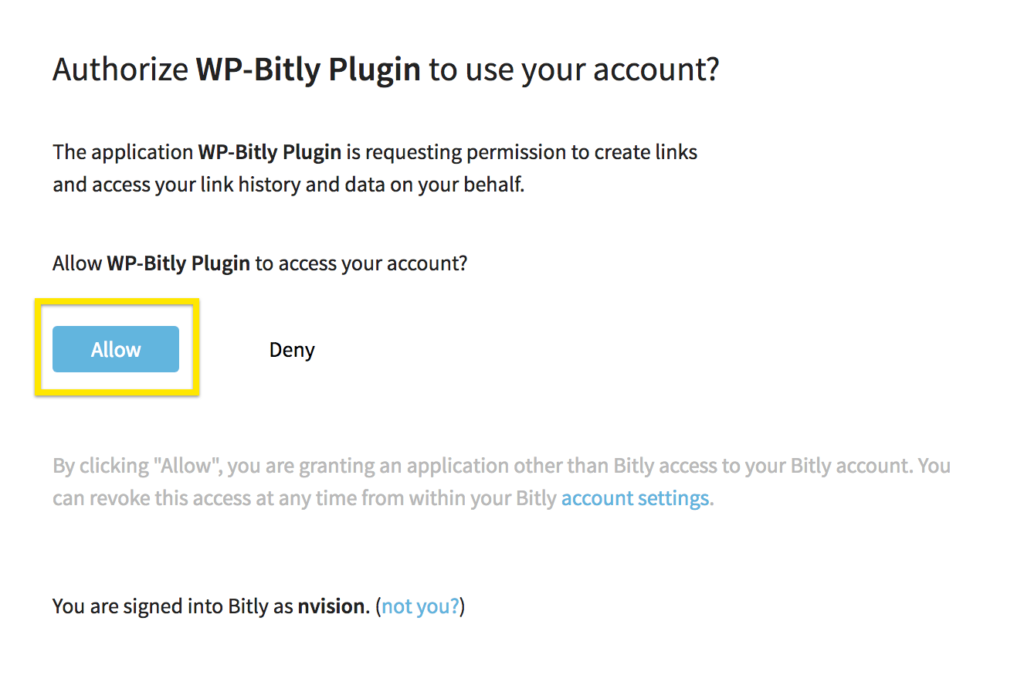
Head back to your website and navigate to Settings > Writing. Scroll down to the WP Bitly Shortlinks section and click the Authorize button. Since you’ve already logged in to your Bitly account you can simply connect the two by clicking the Bitly Authorization button.
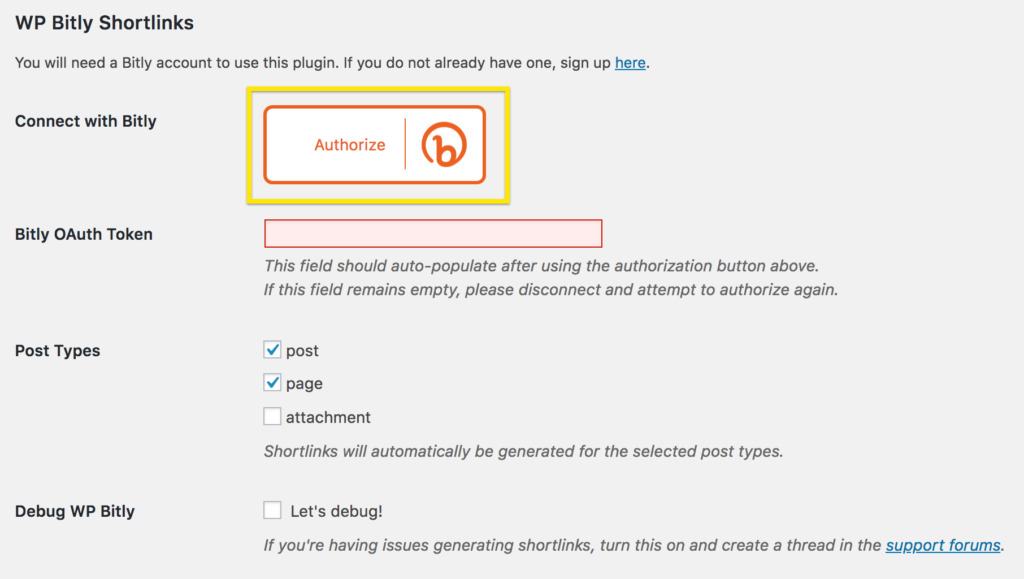
Clicking this button brings us to the to Bitly authorization screen. Click the Allow button.
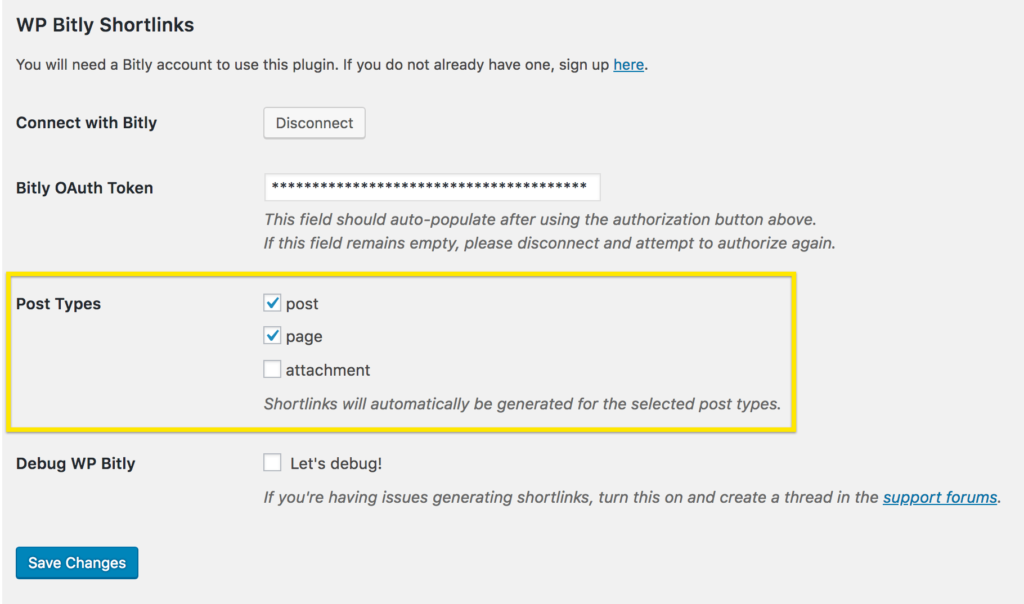
Once you’ve given the plugin permission to access your Bitly account you’ll be redirected back to the settings screen. Choose which post types you want to enable branded short links on and Save your changes.
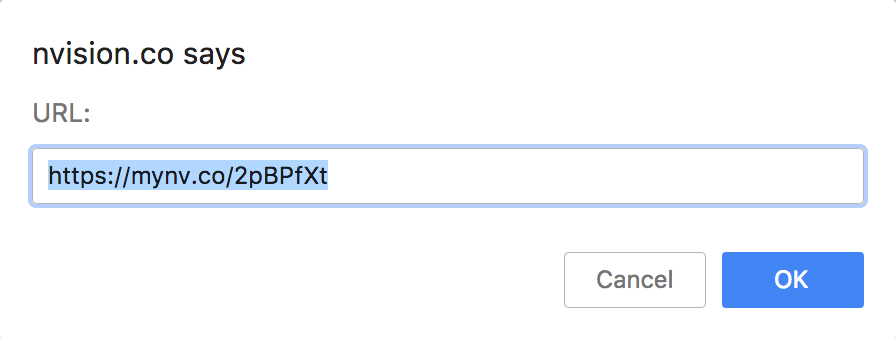
To generate a short link for a post or page simply navigate to that post/page and click the Get Shortlink button that is located next to the permalink.

You’ll be presented with a pop-up that contains the branded shortlink for this post/page. When users visit this link Bitly will redirect them to the proper URL that is associated with this shortlink.
And that’s it!
If you enjoyed this tutorial, are having issues getting this to work, or want to recommend another URL shortening service provider please leave a comment below 🙂
Read More About

Book with us
Warning: Working with our team may result in excessive creativity, uncontrollable 'aha' moments, and an addiction to perfect pixels. Please proceed with caution.