Date
Jul. 27, 2018


Jul. 27, 2018
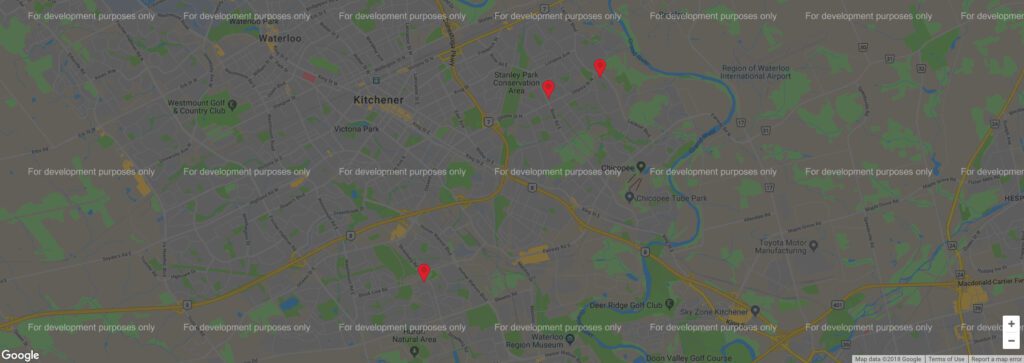
Has your Google Maps map recently stopped working? Are you seeing a For development purposes only message across your Google Maps map? If so, then you can breathe a sigh of relief because I’m going to walk you through the process of setting up a new Google Maps API key to fix this issue.
Since launching the Google Maps Platform, Google has continuously introduced changes to their products, pricing, and support to provide their users with greater flexibility, transparency, and control.
A recent change to the Google Maps Platform requires you to enable billing on your account with a credit card and have a valid API key for all of your projects in order for your Google Maps map to function.
Their official announcement states that:
As of June 11, 2018, you must enable billing with a credit card and have a valid API key for all of your projects. This will give you the ability to scale easily with less downtime and fewer performance issues.
Before I jump into the step-by-step guide that explains how to setup your billing account and generate a new Google Maps API key, I want to share a few links with you that are worth bookmarking for future use:
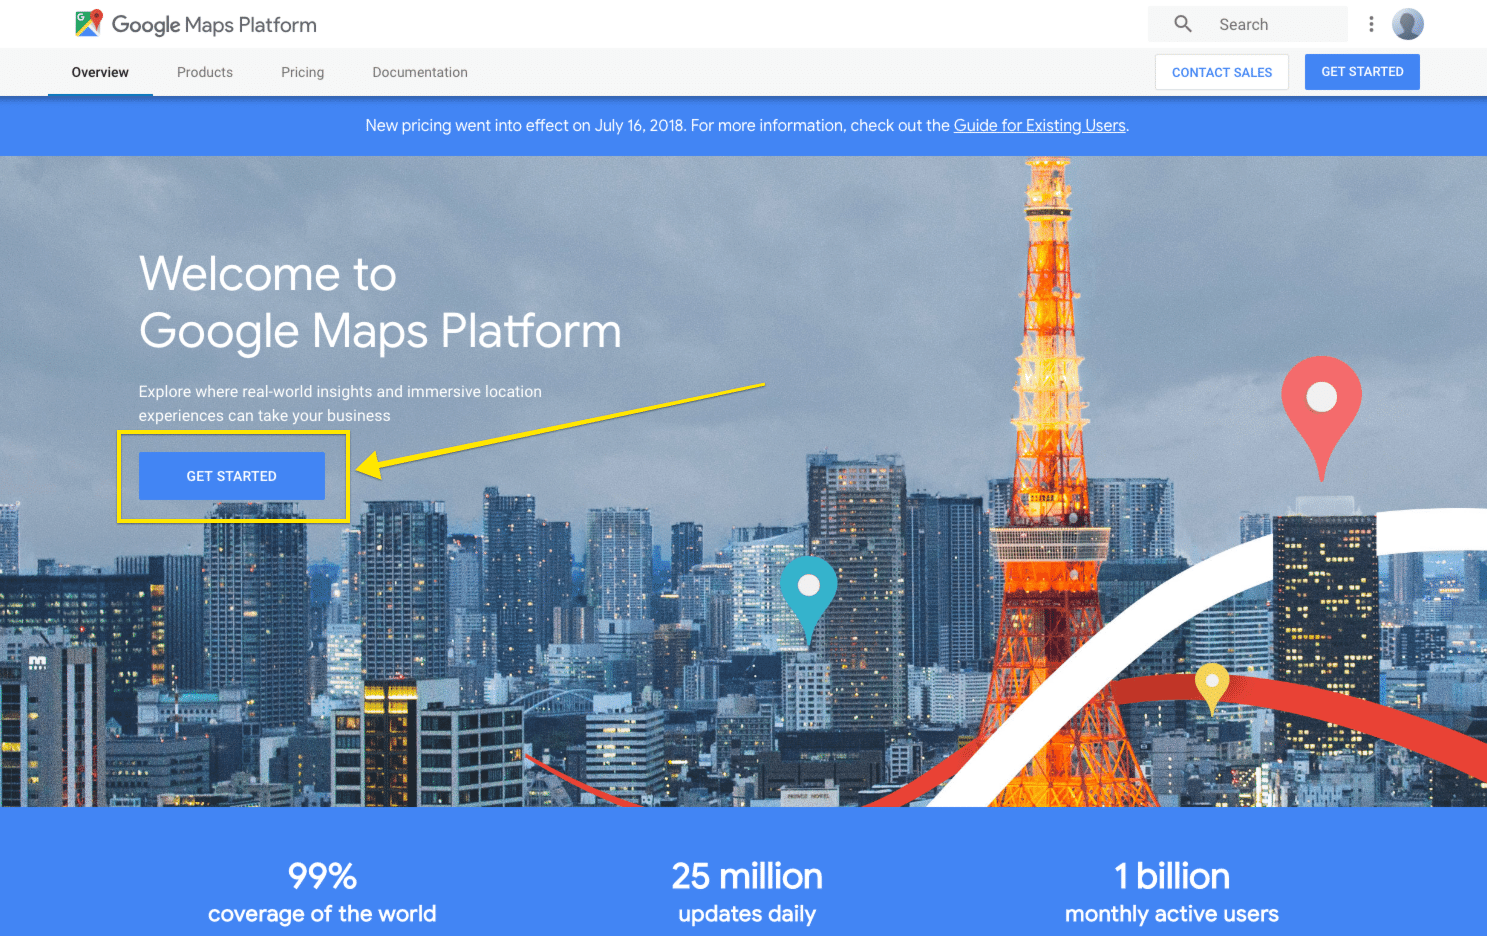
To get started, ensure that you’re logged into your Google account and head over to the following url https://cloud.google.com/maps-platform/.
Click the Get Started button.
The Google Maps Platform has a number of API Libraries available within it. The API Libraries that will be enabled within in your project are determined based on the product(s) that you choose to enable in this step.
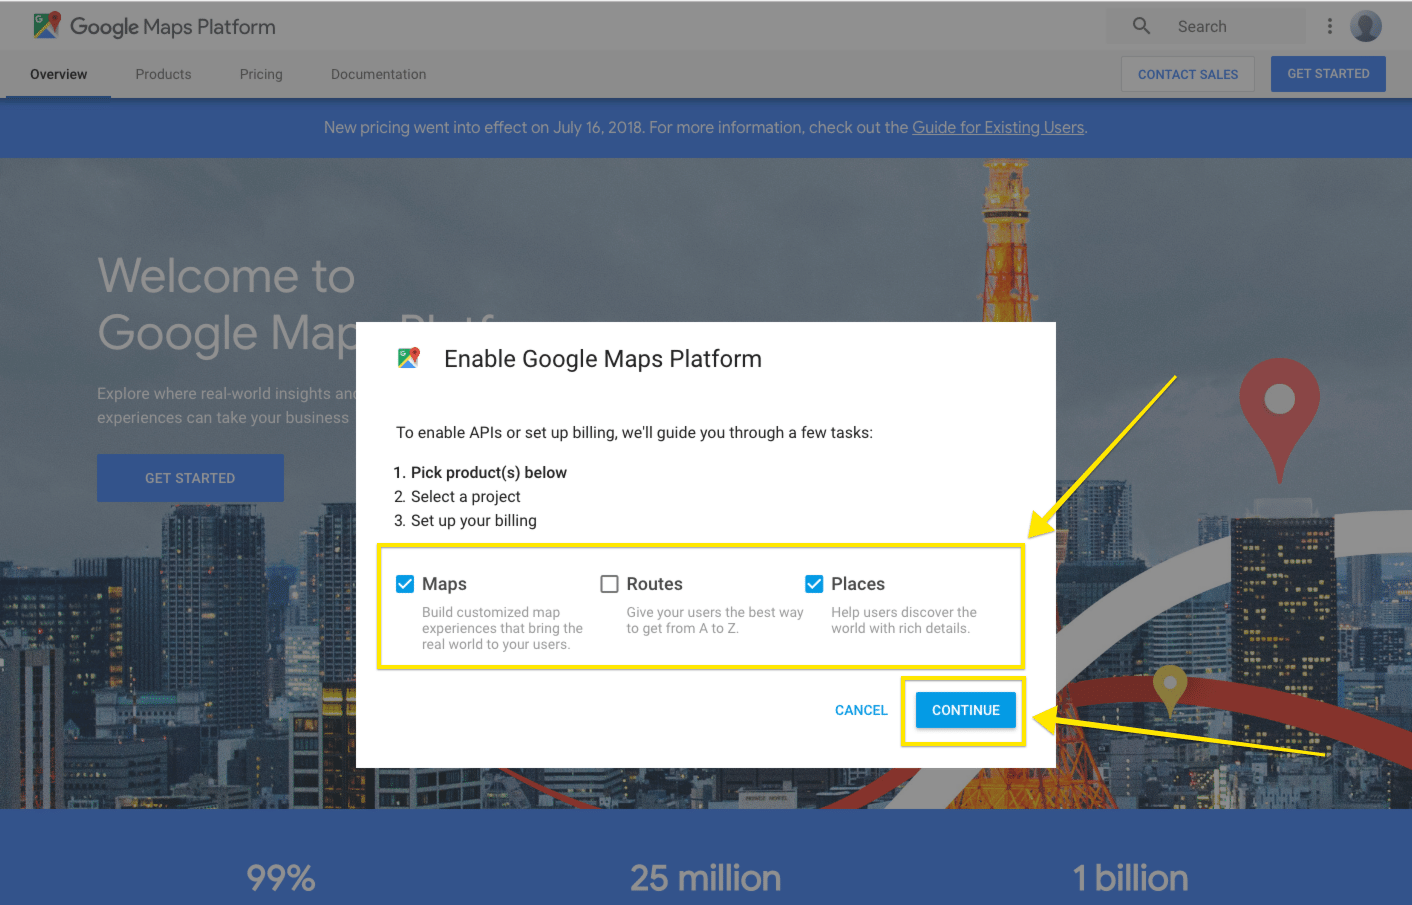
A pop-up will appear and you’ll need to choose the products that you’ll be using within your project. In my example I’ve enabled the Maps and Places products.
Click the Continue button.
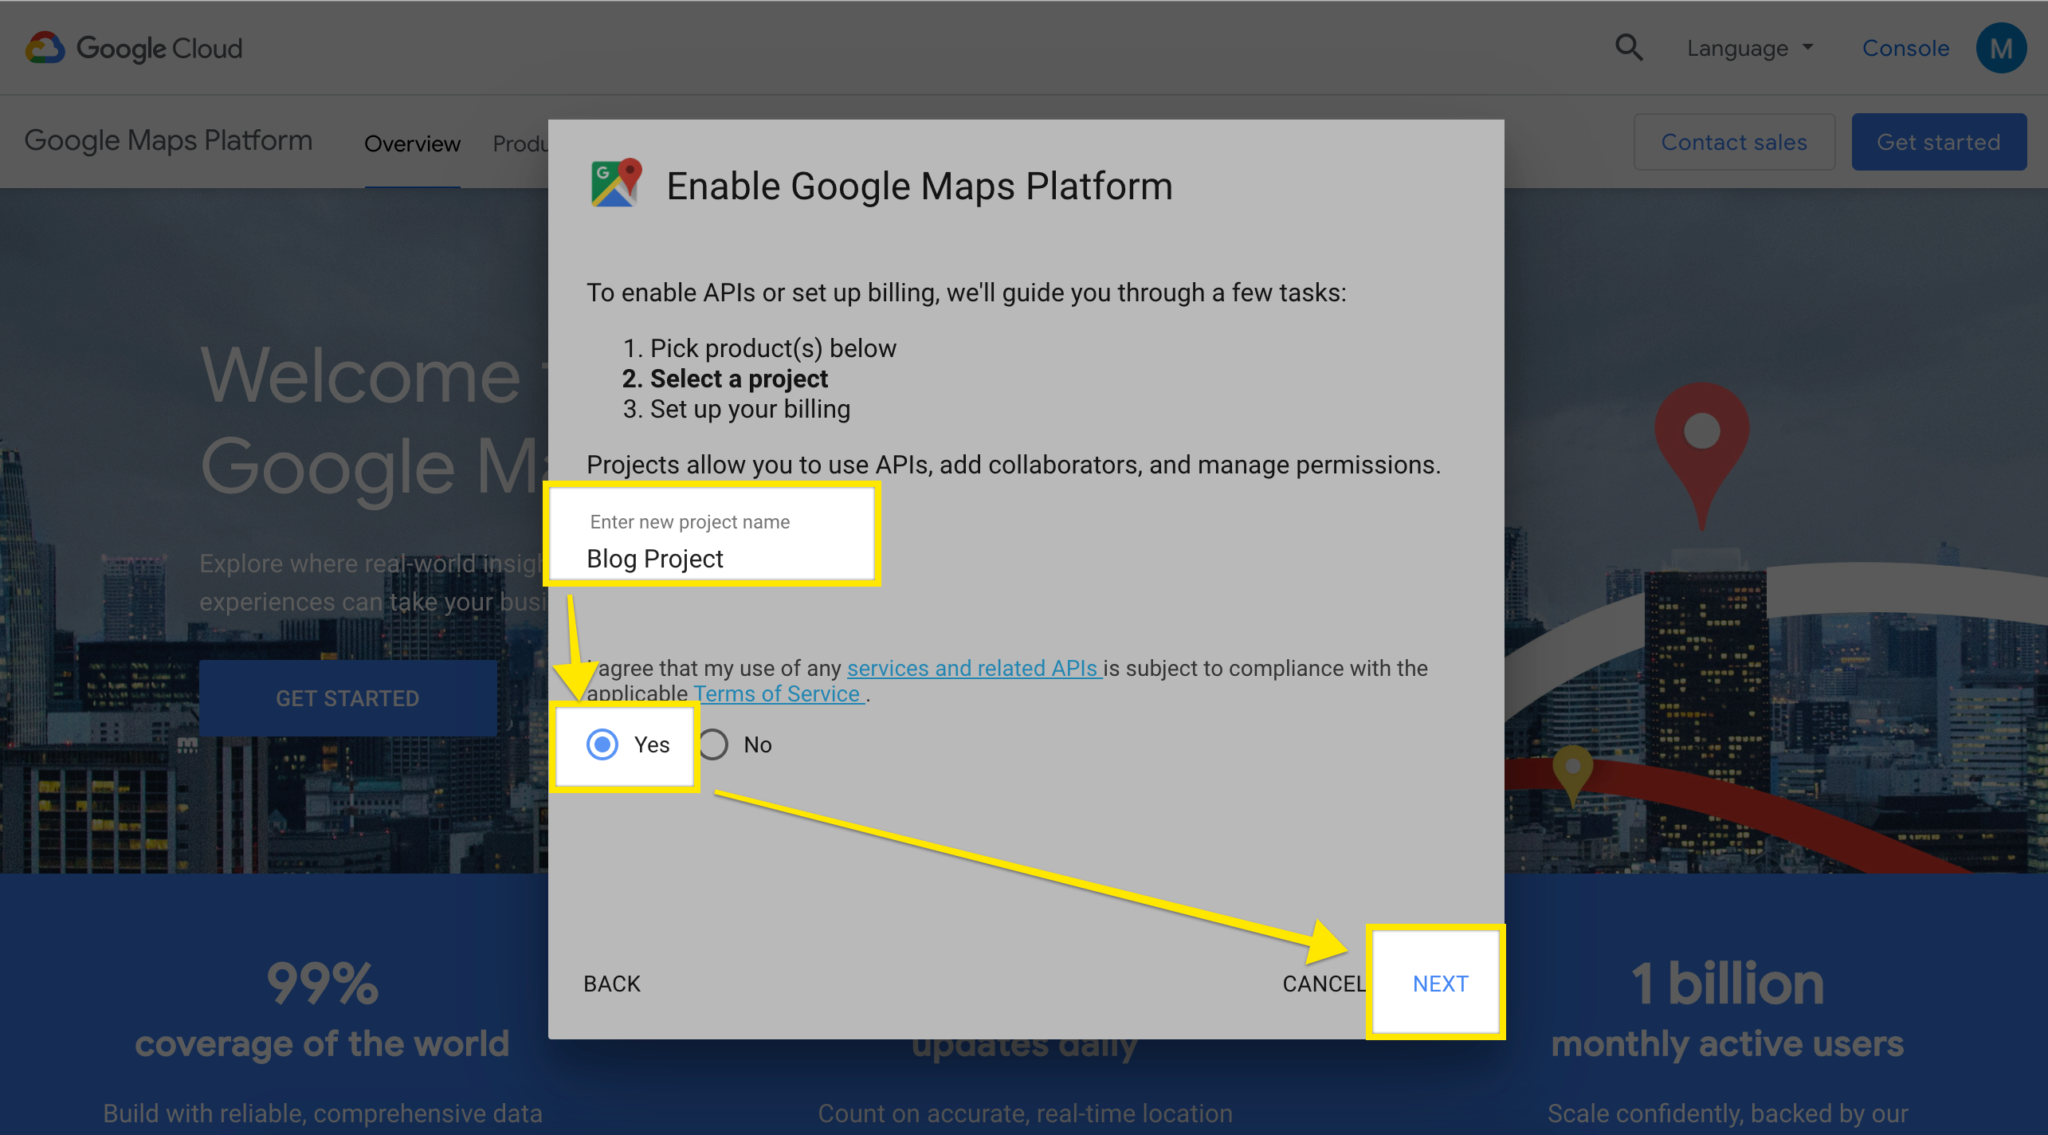
If you’ve previously created a project, select it from the list. If you are creating a new project choose the + Create a new project option from the list and provide a name for your project. I recommend naming it something relevant (like nvision Website) in case you end up creating multiple projects under your account.
Click the Next link.
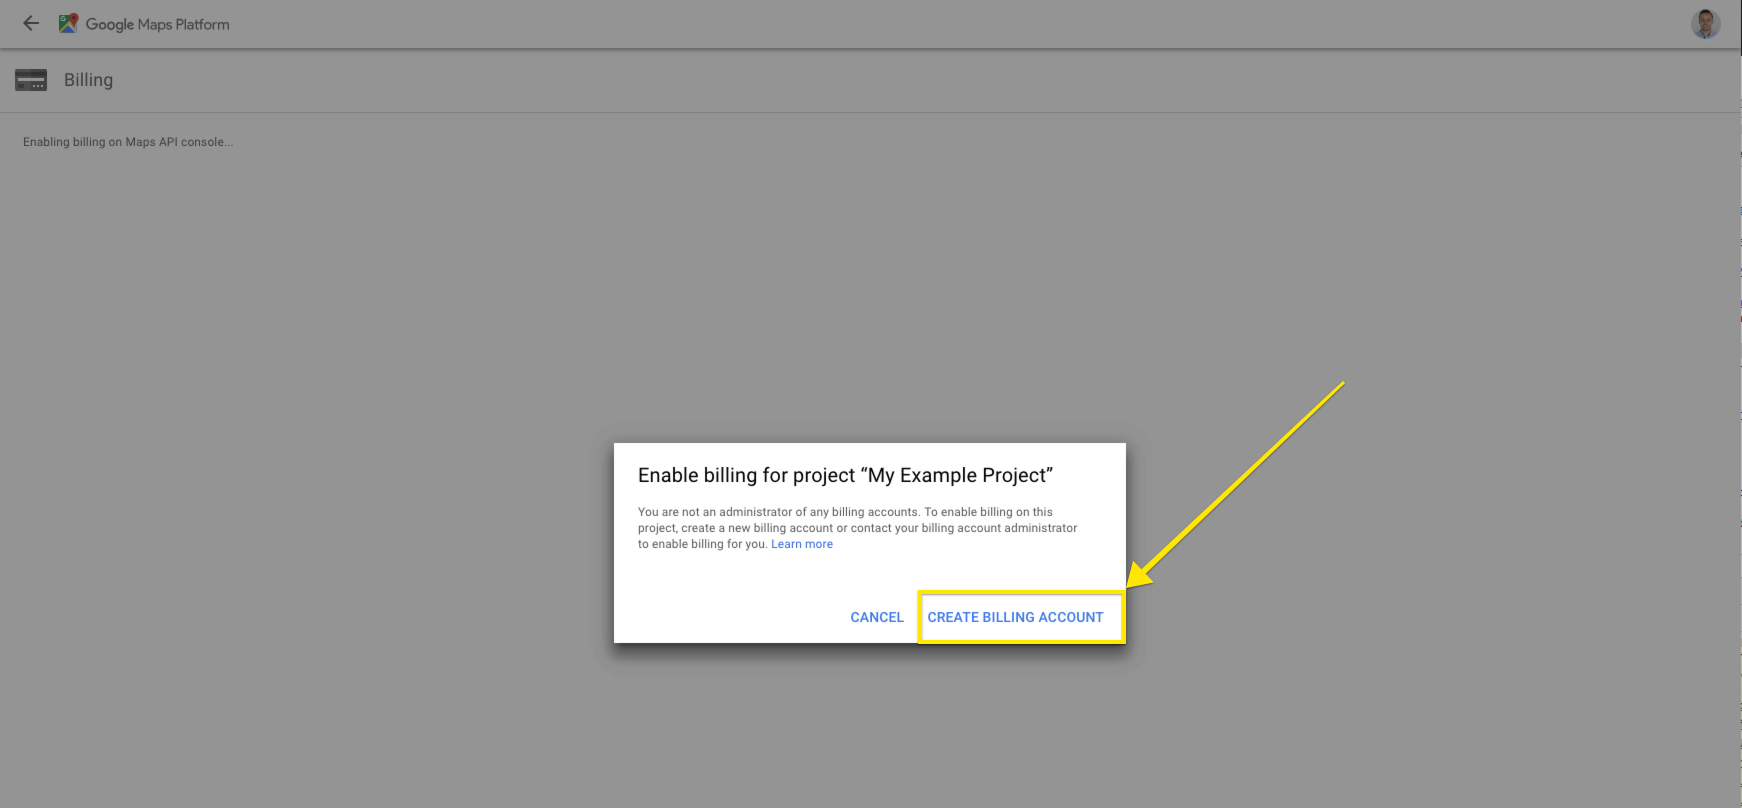
Once you’ve created your project in Step 1, you’ll be redirected to a page that prompts you to enable billing for your project. If you click the Cancel link you’ll be returned to the previous screen and will not be able to continue forward as the Google Maps Platform documentation states that you must enable billing with a credit card for all of your projects.
Click the Create Billing Account link to begin setting up your account.
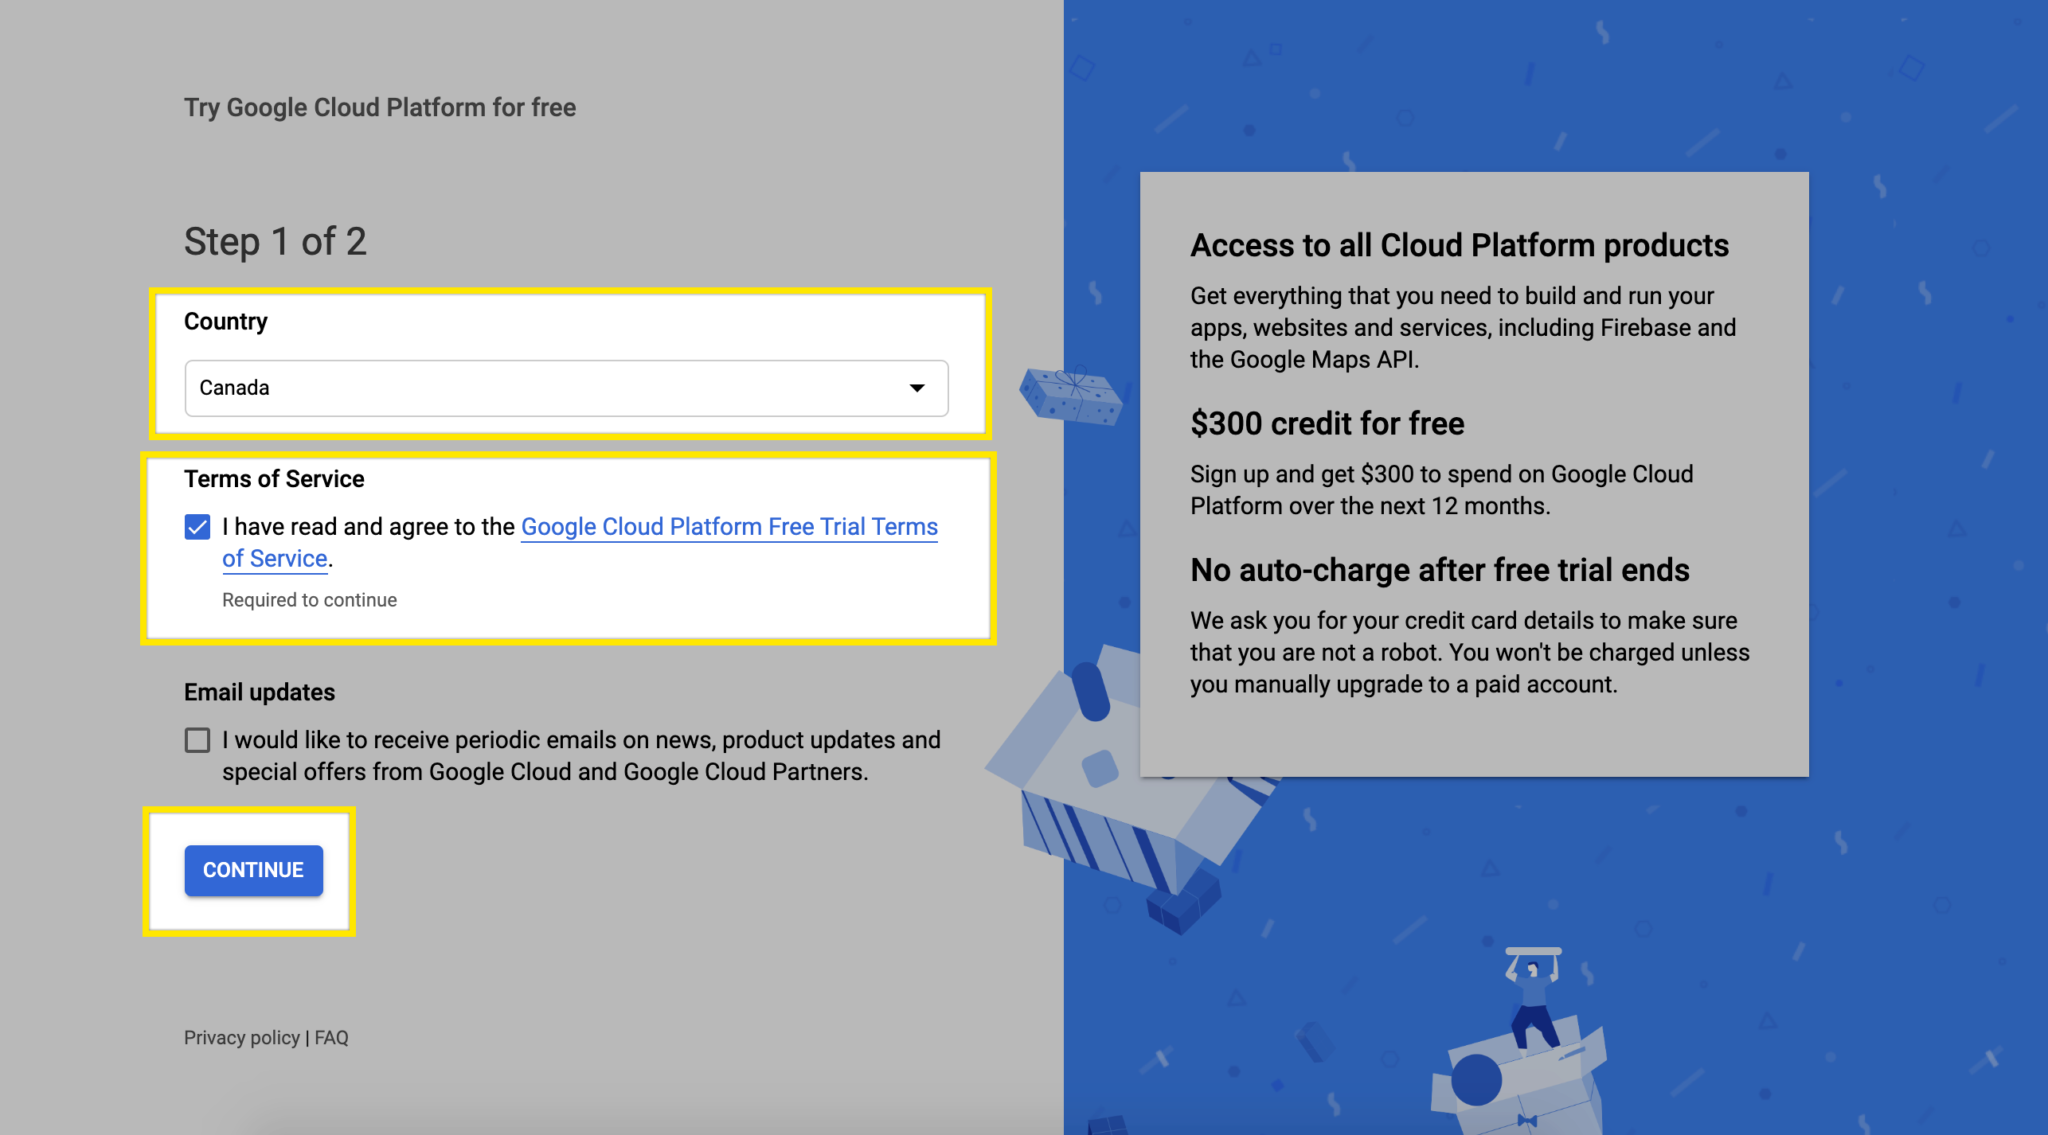
You’ll be prompted to setup your account within the Google Cloud Platform.
Specify your country, optionally sign up for their newsletter, and read and agree to their terms.
Click the Continue button.

Provide your billing information and click the Start my free trial button.
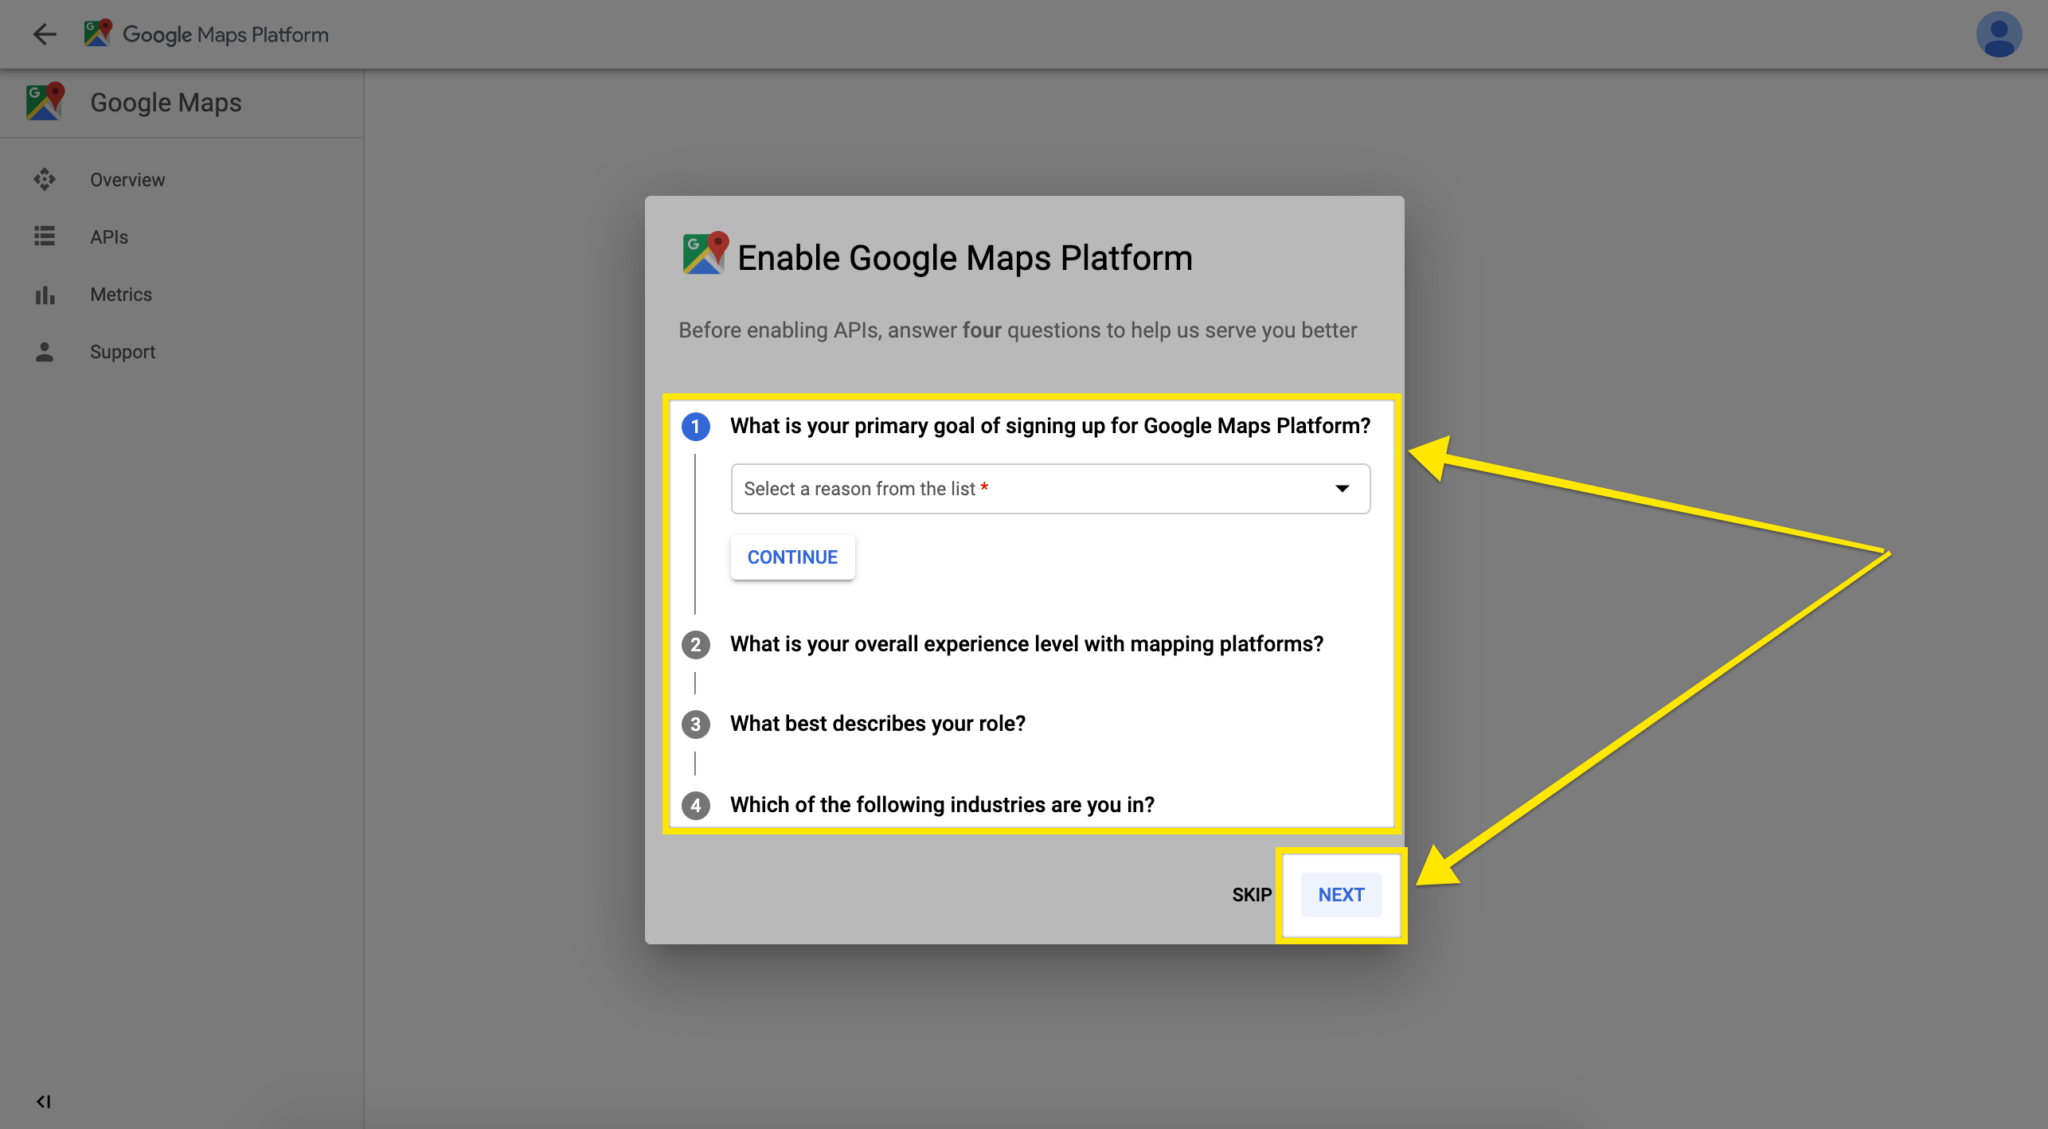
Once you’ve setup your billing account you’ll be redirected to the Google Cloud Platform dashboard. On your first visit you’ll be prompted with a few initial questions about your project. Choose the most appropriate answers from the dropdown or alternatively use the Skip button.

Once you’ve answered (or skipped) the questions, you’ll be prompted to Enable your APIs.
Click the Next link.
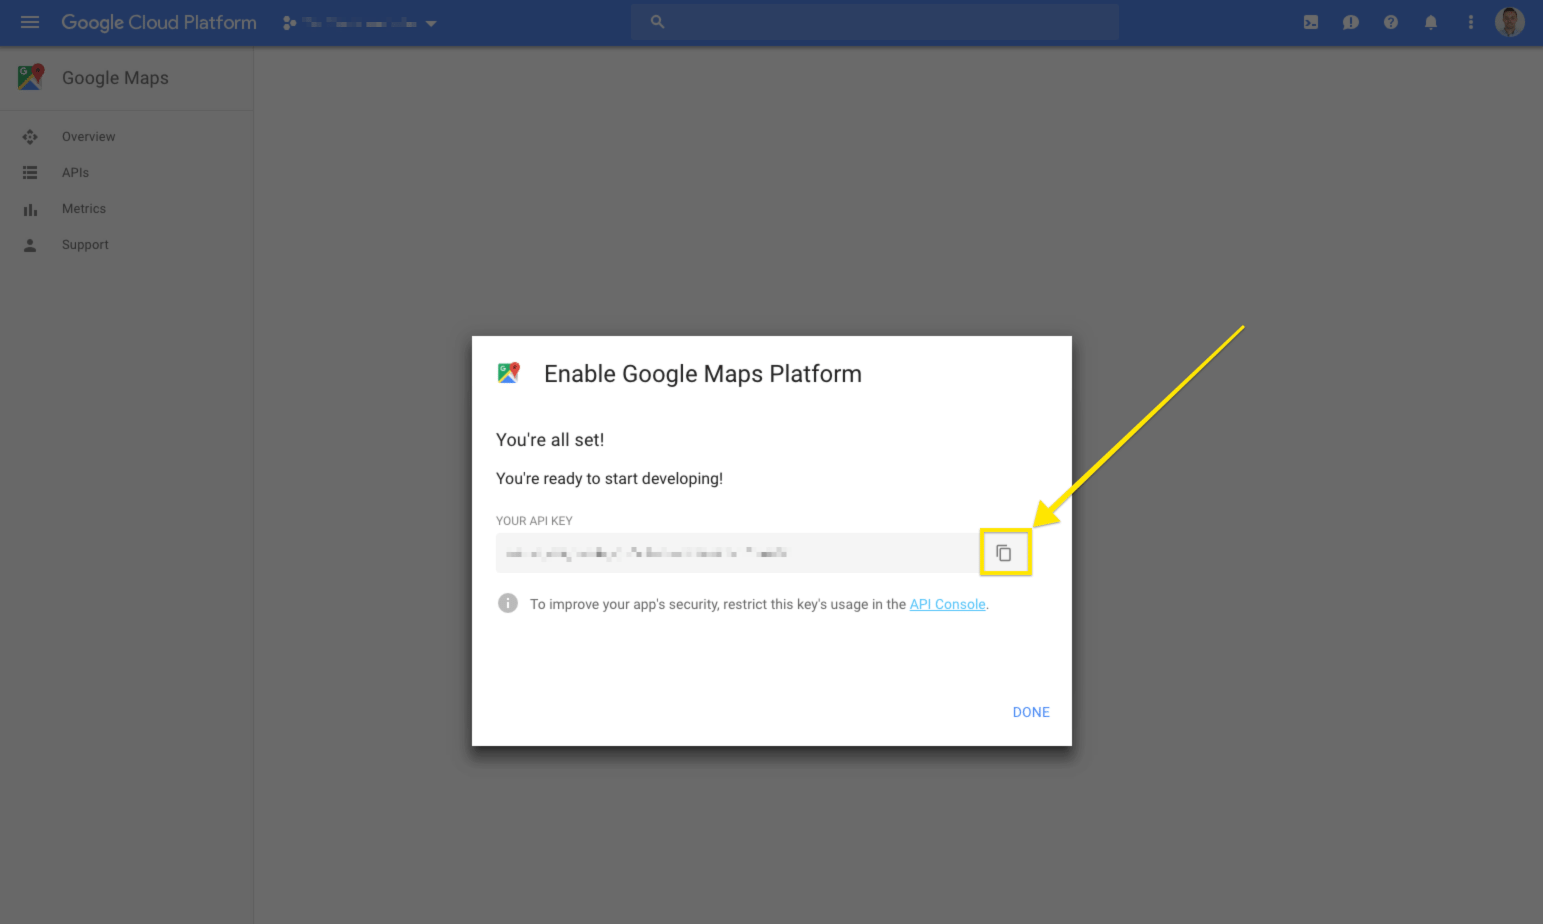
You can use the copy button to copy your API key to your clipboard and start using it on your sites but I recommend applying a restriction to your API key before doing so.
This restriction will allow your key to only work when requested from your website or application (this is recommended to prevent unauthorized use of your API key).
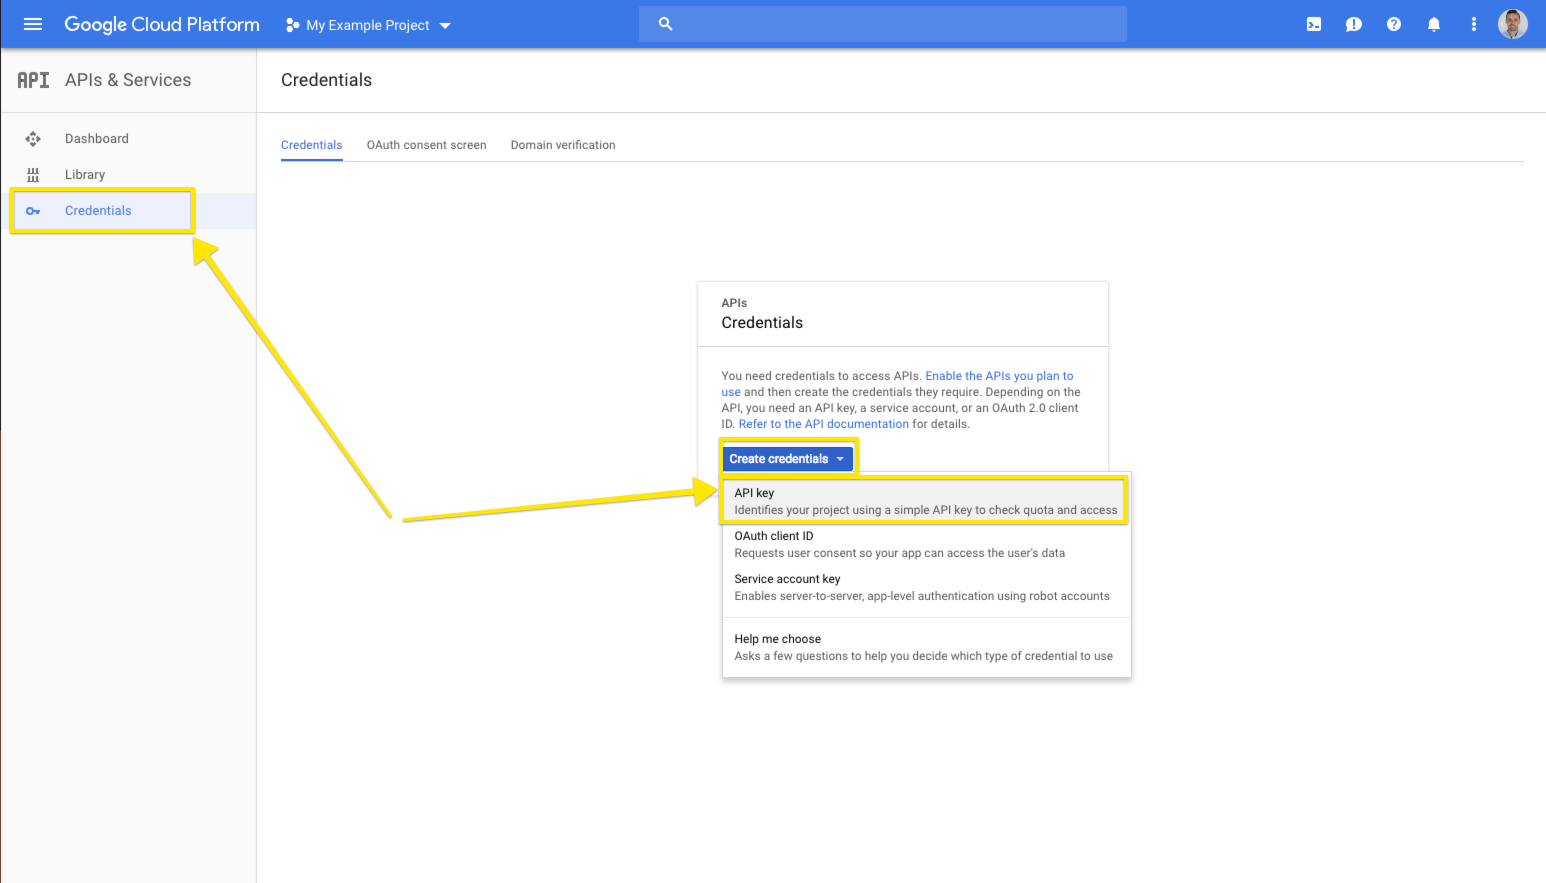
If you aren’t prompted with an option to create a new API key as shown in Step 3a or if you want to create a new key without following the Get Started prompts, you can create a new key by going to the following url:
https://console.cloud.google.com/apis/credentials
Click the Create credentials button and choose the API key option.
You’ll want to apply a restriction on your API key so that it only works on your website/application to prevent unauthorized usage. The platform provide you with multiple restriction methods.
Your options are:
Depending on how you got to this point (Step 3a or Step 3b) there will be a couple of ways to get to the Edit view of your API key to apply a restriction.
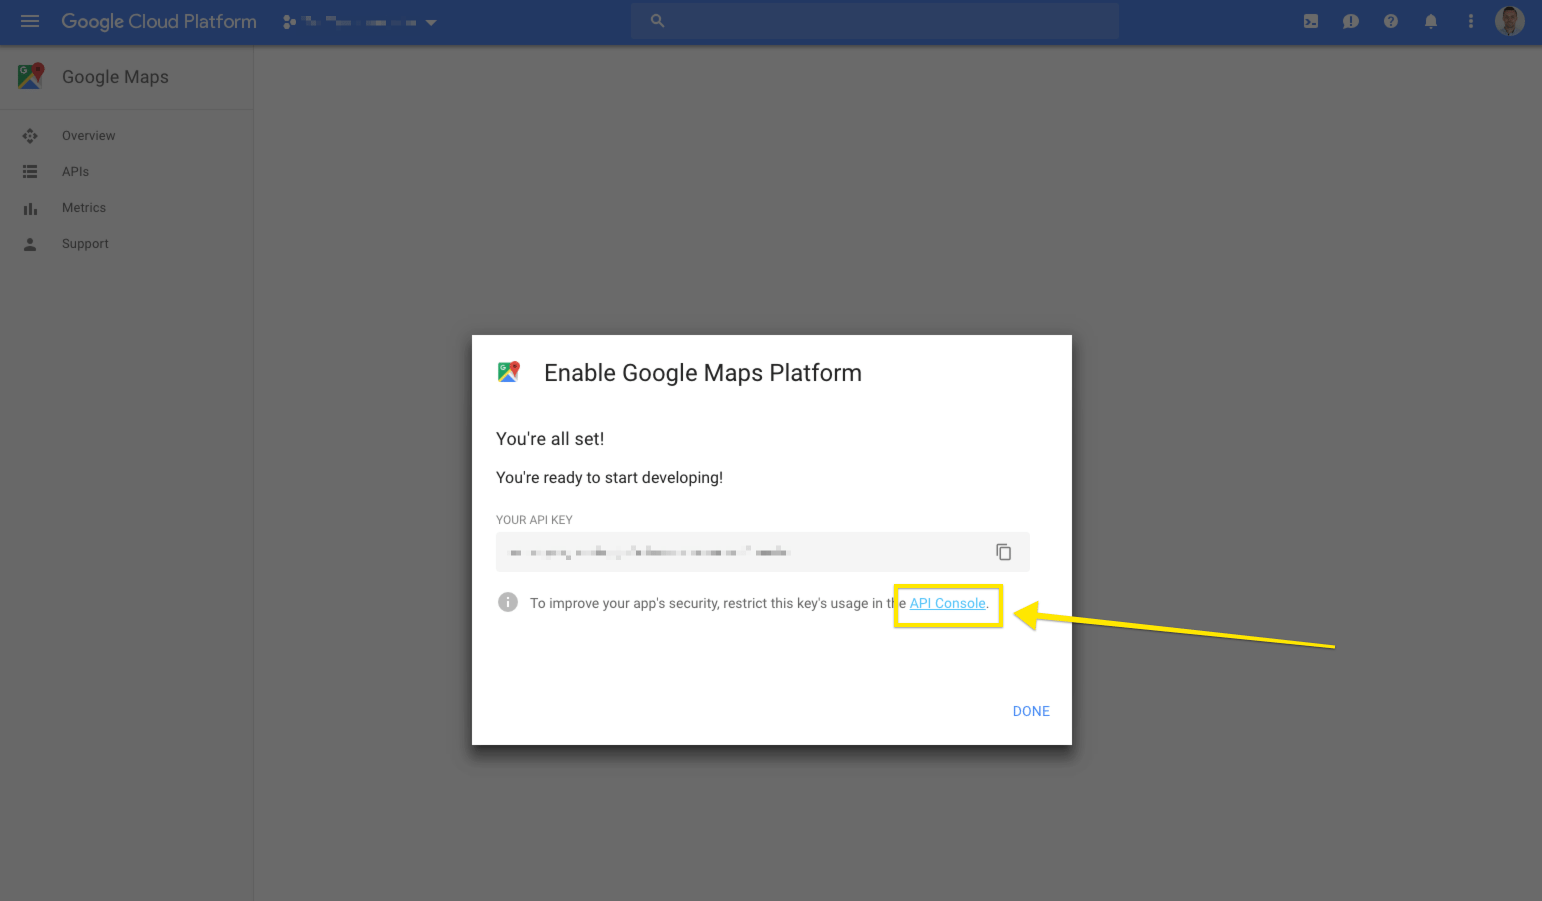
If you got here through Step 3a you can apply a restriction to your API key by clicking the API Console link.
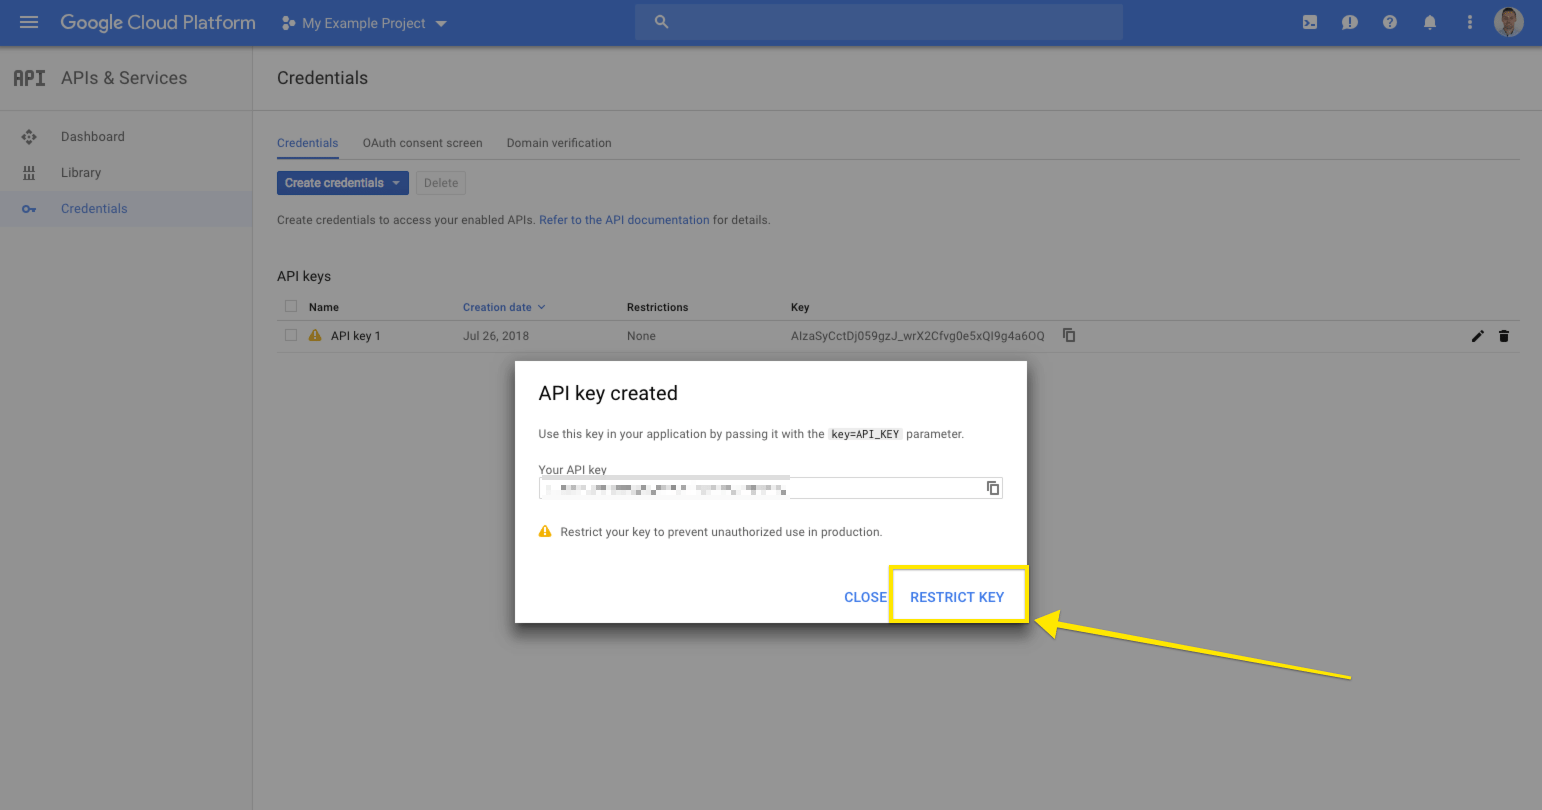
If you got here through Step 3b you can apply a restriction to your API key by clicking the Restrict Key link.
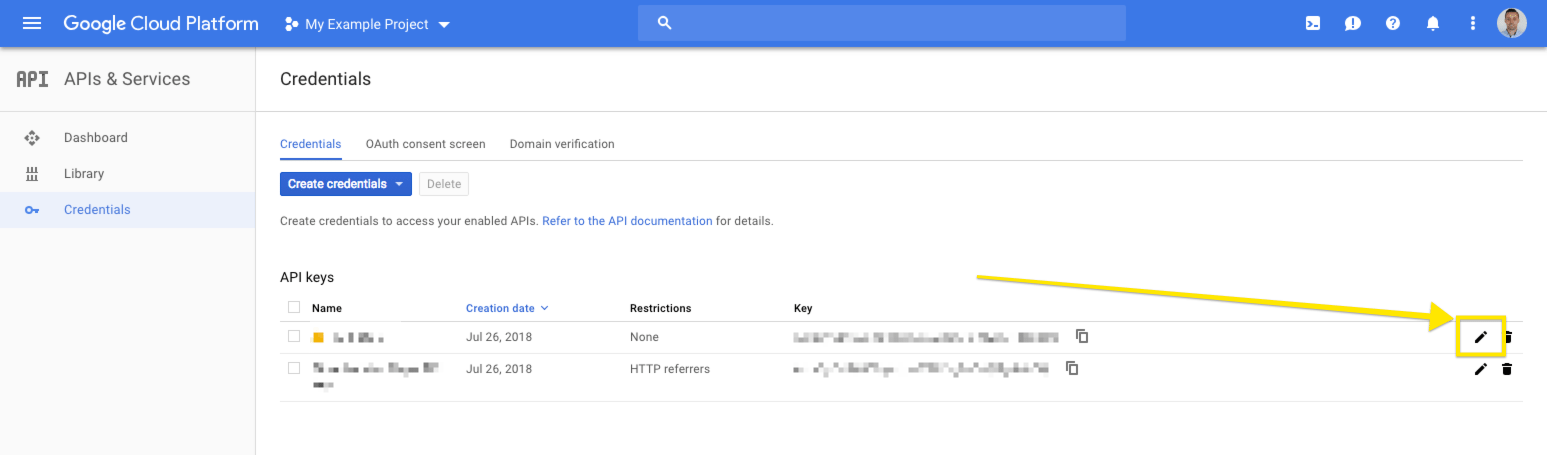
Or you can click the edit button on the Credentials panel.
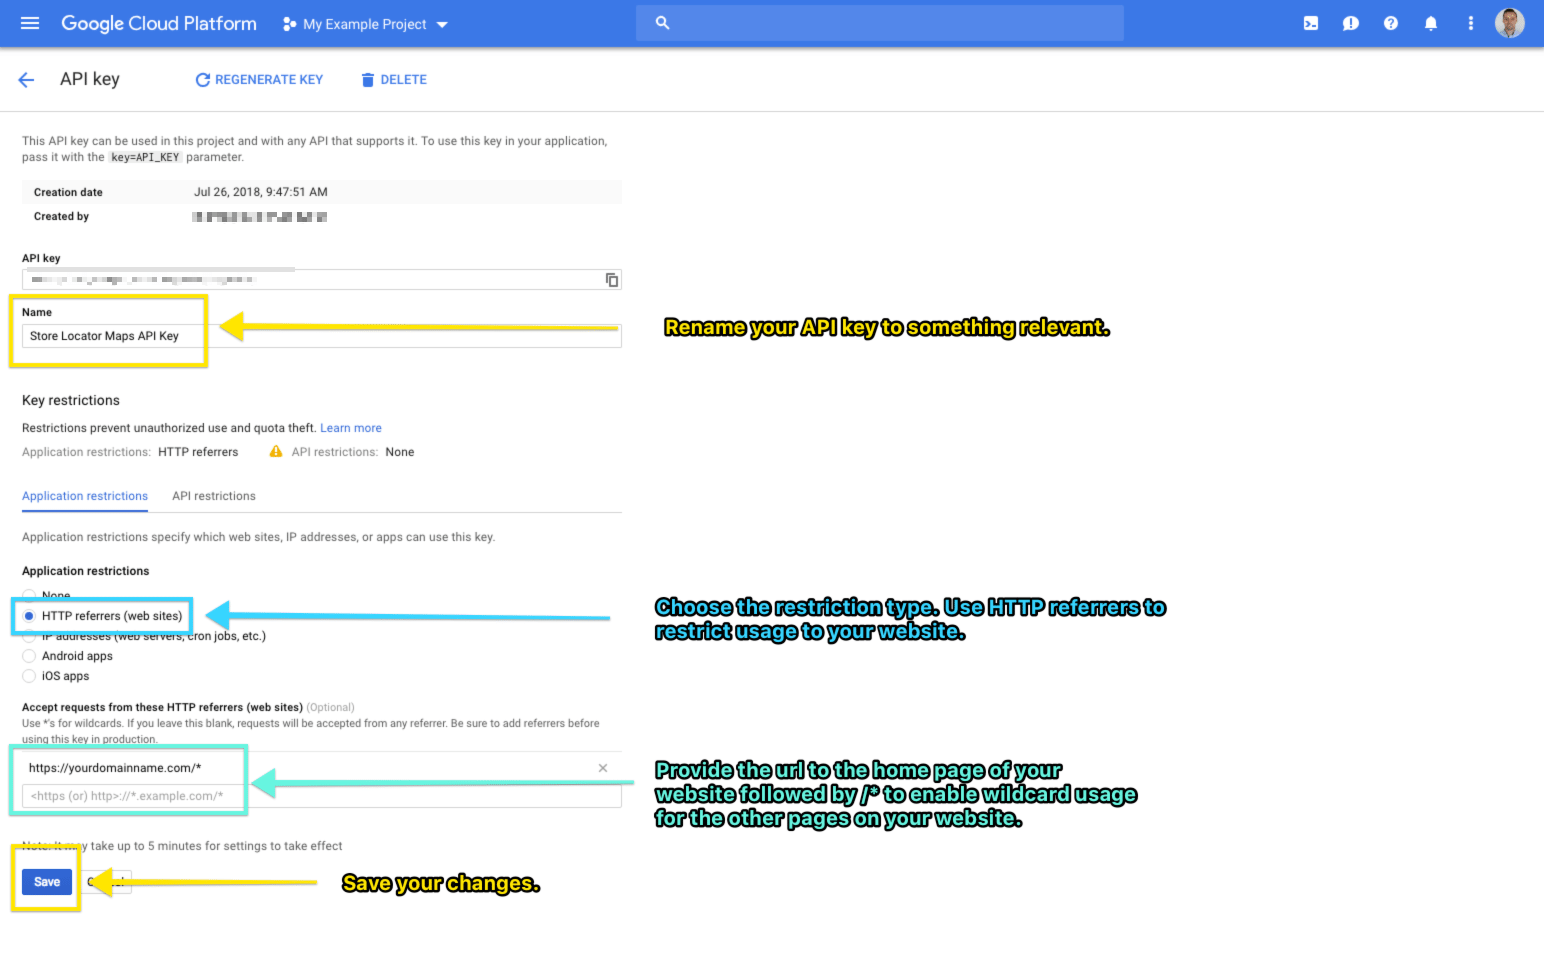
On the API key Edit screen you’ll want to:
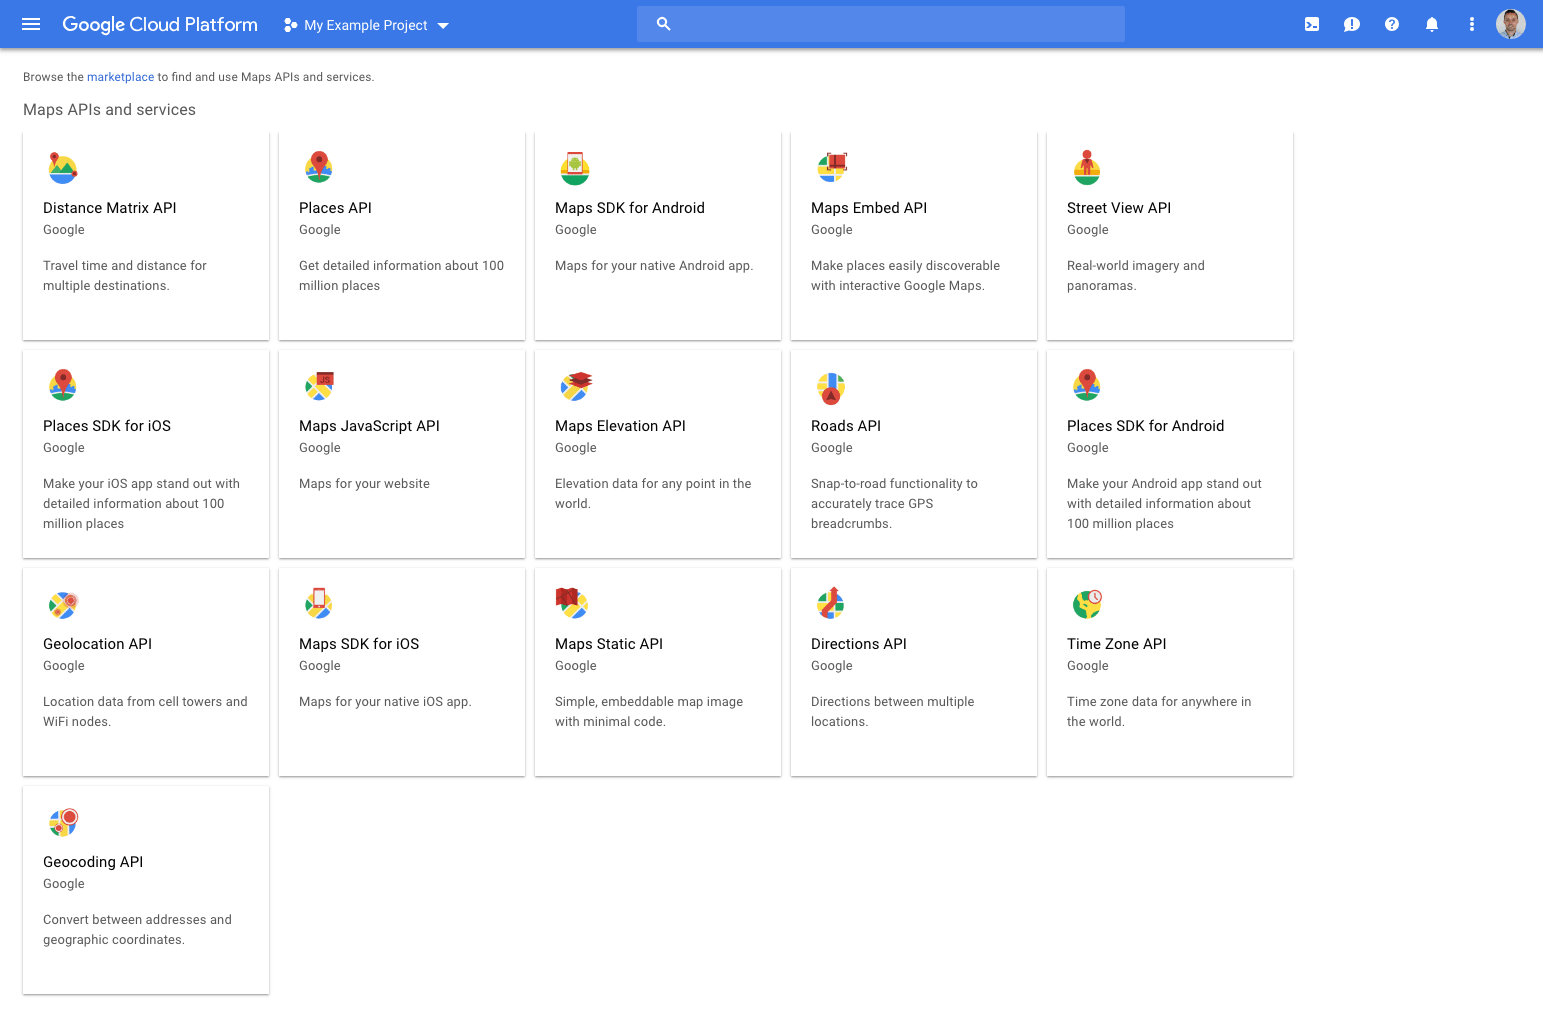
Depending on what you plan on using the API key for, you may need to enable additional APIs through the API Library.
Most of our projects have similar Google Maps functionality and enabling the Maps JavaScript API along with the Places API covers our needs.
We use the ACF (Advanced Custom Fields) plugin on our WordPress sites so the Places API library is required to search for locations within the Google Maps field type.
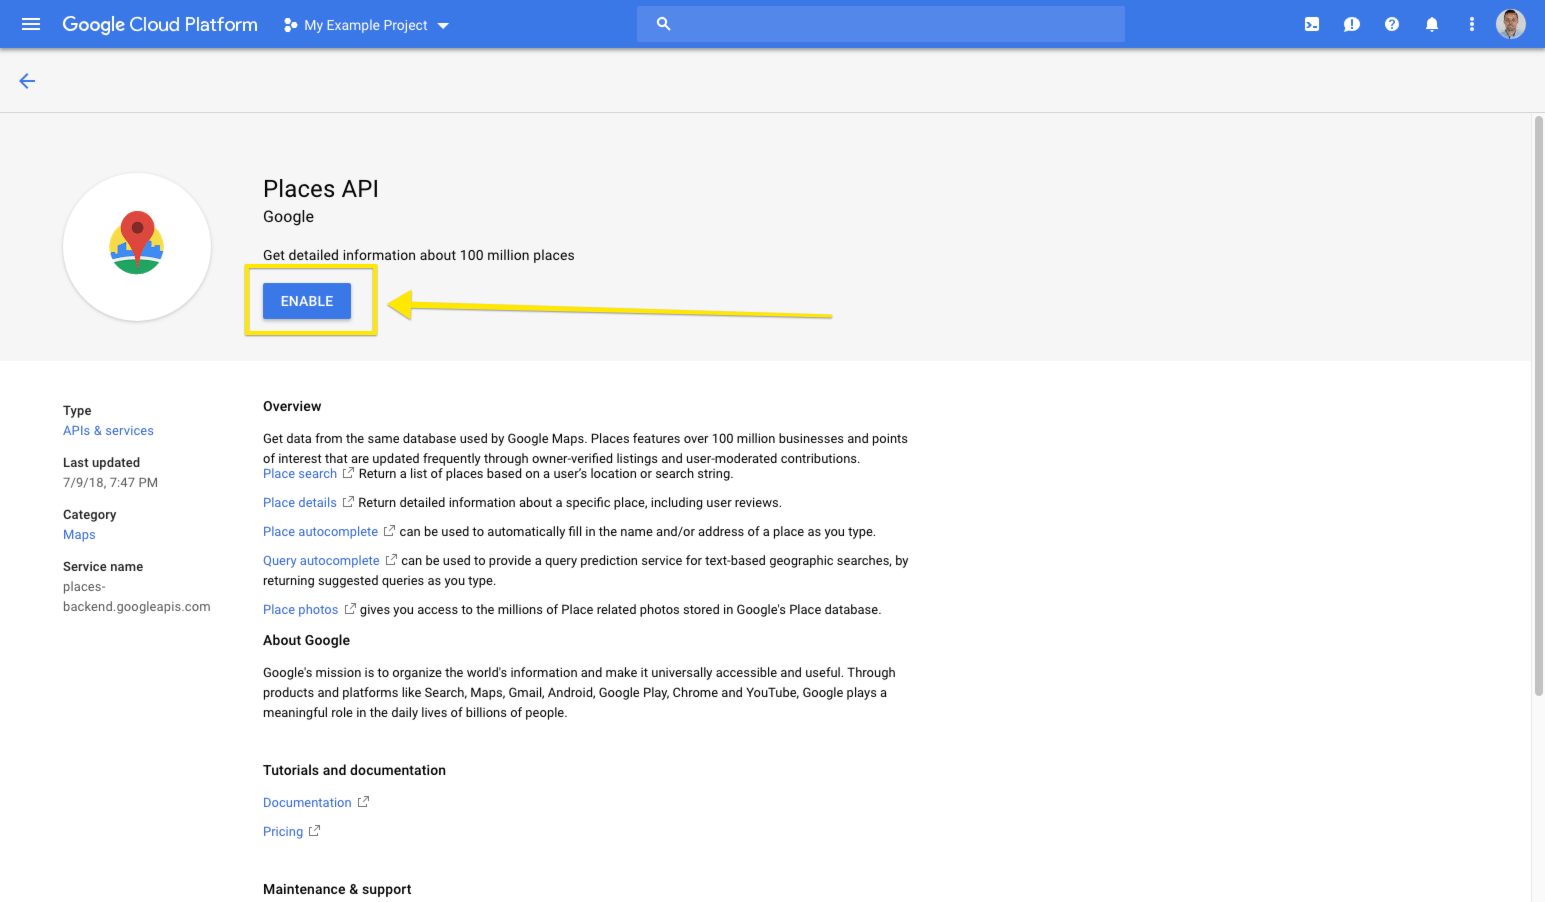
To enable an API Library within your project simply click on the library in the Library dashboard. You’ll be brought to the overview page of that API library. Read through the information and if the library looks like it’s something that you’ll need on your Google Maps map click the Enable button.

Now that your new Google Maps API key is all setup and ready-to-go, simply update the key within your website or application in the appropriate places.
If you’re not sure where the update needs to take place, contact a developer or your webmaster to take care of the update for you.
The update will occur in a script that looks similar to this:
https://maps.googleapis.com/maps/api/js?key=YOUR_API_KEY&callback=initMap
Thanks for checking out this article. If you notice any errors in the instructions above or have suggestions for improvements, simply drop me a comment below. Any and all feedback is welcome 🙂

Let’s accomplish what you are looking for, our team of experts are here for you.
Let's work togetherWarning: Working with our team may result in excessive creativity, uncontrollable 'aha' moments, and an addiction to perfect pixels. Please proceed with caution.